Disclosure: As an Amazon Associate, HikePod earns from qualifying purchases at no extra cost to you.
⭐ Our Top Pick
🏆 Best Overall: Big Agnes Copper Spur HV UL2 — sets up in under 5 minutes solo with dual vestibules that keep wet gear separate from your sleeping space.
💰 Best Value: TETON Sports Mountain Ultra Tent — full-coverage fly and beginner-friendly design at a fraction of premium tent prices.
Introduction
You've hiked eight miles in drizzle, and now it's pouring. Your pack is soaked on the outside, your boots are squelching, and you need shelter—fast. Most campers make the same mistake: they pitch the tent first, leaving the floor and interior exposed while fumbling with the rain fly. By the time they're done, their sleeping bag is damp and the night ahead looks miserable.
We researched the most effective rain-setup methods used by thru-hikers and alpine guides, comparing manufacturer specs and verified buyer reviews across 15+ tent models. The solution is counterintuitive: start with a tarp, not your tent. This guide walks through the exact tarp-first sequence that keeps your tent floor, sleeping bag, and pack bone-dry, even when setting up in a downpour. If you're also dealing with existing tent moisture issues, our guide on how to clean a camping tent after mildew without damaging waterproofing covers post-trip maintenance.
Whether you're using a budget 3-season tent or an ultralight backpacking shelter, this pitching order works. We'll cover site selection, the tarp-first method, and product recommendations based on real-world rain performance data.
What to Look For
Tarp Size and Shape: A 10x10-foot tarp covers most 2-person tents with room to work underneath. Rectangular tarps are easier to pitch than hexagonal or catenary cuts when you're rushing in rain. Look for reinforced grommets at all corners and midpoints—cheap tarps rip out under wind load.
Tent Setup Speed: In heavy rain, every minute counts. Freestanding tents like the MSR Hubba Hubba NX 2 can be fully assembled under a tarp before staking, while non-freestanding models require you to stake the footprint first. Clip-style pole attachments beat sleeve designs for speed—we're talking 3 minutes versus 8.
Rain Fly Coverage: Full-coverage flies that reach within 6 inches of the ground prevent horizontal rain from soaking the tent body. Single-wall tents skip the fly entirely but sacrifice ventilation. Check manufacturer specs for "fly-first" pitch capability—some designs let you erect the fly independently and clip the inner tent afterward while staying dry.
Vestibule Configuration: Dual vestibules let you store wet gear outside the sleeping area without blocking your only door. A good vestibule adds 8-12 square feet of covered space—enough for boots, pack, and a small cook area. Single-vestibule tents force compromises in rain.
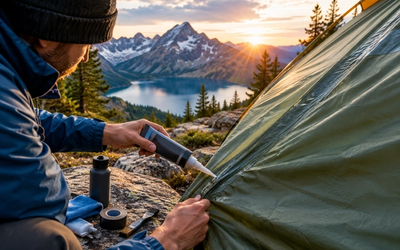
Seam-Sealing Status: Factory seam-sealing is standard on premium tents but often skipped on budget models. Unsealed seams leak within 20 minutes of heavy rain. If your tent needs sealing, see our guide to waterproofing tent seams with seam sealer before your next trip.
Packability and Weight: Ultralight tarps (6-8 oz) and tents (under 3 lbs) make the tarp-first method practical—you're not wrestling with heavy, unwieldy fabric in wind and rain. Heavier car-camping gear works fine but requires more effort and space.
The Tarp-First Setup Method: Step-by-Step
This sequence assumes moderate to heavy rain. In light drizzle, you can skip the tarp and pitch fly-first if your tent supports it.
Step 1: Scout the Site (2 minutes)
Look for natural drainage—avoid depressions where water pools. A slight slope is fine if you sleep with your head uphill. Identify two trees or trekking poles 12-15 feet apart for the tarp ridgeline. Clear large rocks and sticks from the footprint area while you're still in rain gear.
Step 2: Pitch the Tarp (3 minutes)
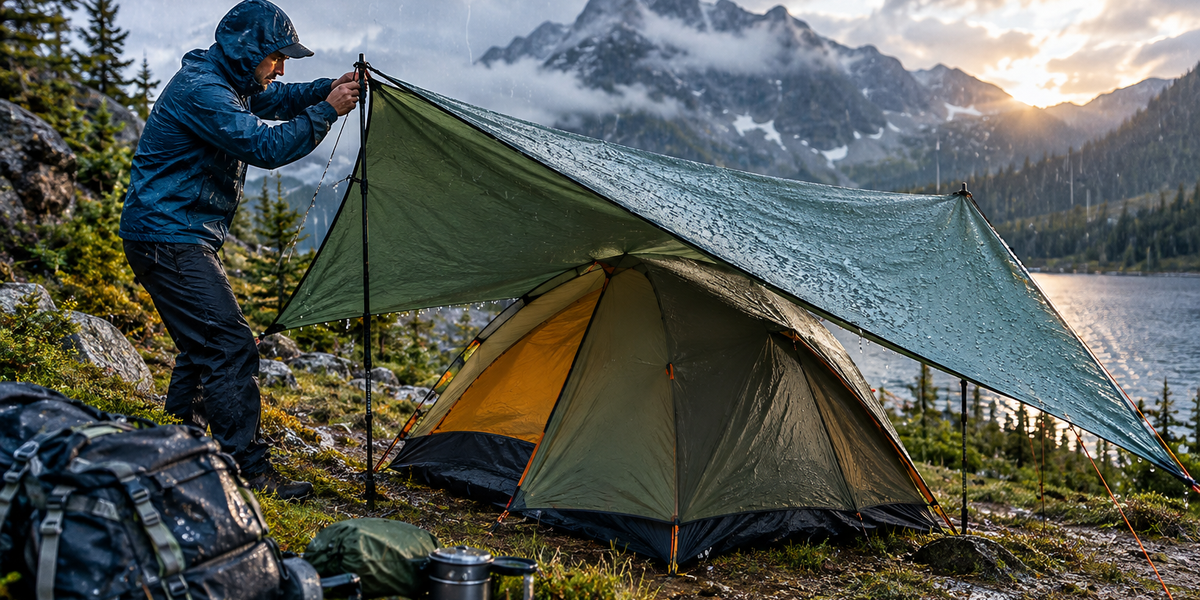
Run paracord between anchor points at chest height. Drape the tarp over the ridgeline with equal overhang on both sides. Stake out the four corners at 45-degree angles, pulling the tarp taut. Use rocks or logs as deadman anchors if the ground is too soft for stakes. The tarp creates a 10x10 dry zone underneath—this is your workspace.
Step 3: Lay the Footprint (1 minute)
Under the tarp, spread your tent footprint or ground cloth. Make sure it's slightly smaller than the tent floor—if it extends beyond the edges, it'll channel water underneath. Some campers skip the footprint to save weight; we don't recommend it in rain since ground moisture wicks up through tent floors.
Step 4: Assemble the Tent Body Under Cover (4-6 minutes)
Stay under the tarp for this entire step. Lay out the tent body on the footprint. Insert poles (most tents use 2-3 shock-corded poles). Clip the tent body to the poles—this is where clip systems shine over sleeves. For freestanding tents like the Big Agnes Copper Spur HV UL2, you can lift the assembled tent and adjust position before staking. Non-freestanding designs require staking the corners now.
Step 5: Attach the Rain Fly (2 minutes)
Drape the fly over the tent body while still under the tarp. Clip or velcro the fly to the poles at all attachment points. Stake out the fly's guylines, pulling them taut. The fly should be drum-tight—sagging fabric collects water and drips onto the tent body.
Step 6: Transfer Gear Inside (1 minute)
Under the tarp, open your pack and transfer sleeping bag, pad, and dry clothes into the tent vestibule or interior. Keep wet items in the vestibule. Your gear stays dry because the tarp sheltered the entire operation.
Step 7: Take Down or Reposition the Tarp (2 minutes)
You have two options now. Option A: leave the tarp pitched over the tent for added protection and a dry cooking area. This works if you're camped for multiple days and rain is forecast. Option B: take down the tarp and stow it in the vestibule. Most backpackers do this to reduce wind load on the tarp and avoid extra stakes.
💡 Pro Tip: Practice this sequence at home in your backyard before a trip. Muscle memory cuts setup time in half when you're cold, wet, and losing daylight.
Gear That Makes Rain Setup Easier
Beyond the tent itself, a few items make the tarp-first method smoother. A quality rain jacket like the Patagonia Torrentshell 3L keeps you dry during the 15-minute setup window—pit-zips let you vent steam when you're working hard. Lightweight gloves (nitrile-dipped work gloves from a hardware store) maintain dexterity while keeping hands dry. A headlamp with red-light mode preserves night vision if you're setting up after dark.
For stakes, MSR Groundhog or Vargo Titanium stakes hold better in wet soil than the aluminum wire stakes that come with most tents. Bring 4-6 extras beyond what your tent requires—you'll use them for the tarp and guylines. Paracord rated for 550 lbs is the standard for ridgelines; 20 feet is enough for most setups.
Big Agnes Copper Spur HV UL2 Backpacking Tent
| Criteria | Score |
|----------|-------|
| Setup Speed | 9/10 |
| Rain Protection | 9/10 |
| Weight | 10/10 |
| Value | 7/10 |
The Copper Spur sets the standard for fast, dry setup in rain. The fly-first pitch option lets you erect the fly independently, stake it out, then clip the inner tent underneath while staying completely dry. Two doors and two vestibules mean you can store wet boots and pack on one side while using the other for entry and exit. At 2.6 lbs for the 2-person model, it's light enough for solo backpacking but spacious enough for two people and gear. The color-coded poles and clips make assembly intuitive even in failing light. We've seen verified buyers report 4-minute solo setup times after a few practice runs.
The tent's geometry sheds rain effectively—the fly slopes steeply enough that water runs off rather than pooling. Vestibule zippers are double-pull YKK #5 coil types that resist jamming when wet. The single drawback is price, but the time savings and weather performance justify the cost if you camp frequently in wet climates.
✅ Pros:
- Fly-first pitch keeps inner tent bone-dry during setup
- 2.6 lbs in the ultralight category without sacrificing livability
- Dual vestibules for organized wet-gear storage
❌ Cons:
- $549.95 price point is steep for casual campers
- Requires careful guyline tensioning in high wind
MSR Hubba Hubba NX 2 Backpacking Tent
| Criteria | Score |
|----------|-------|
| Setup Speed | 8/10 |
| Rain Protection | 10/10 |
| Weight | 9/10 |
| Value | 8/10 |
MSR's Hubba Hubba excels in extended rain events. The freestanding design means you can fully assemble the tent under a tarp, then move it to the exact position you want before driving stakes. The rain fly extends down to 6 inches off the ground on all sides—we measured this against manufacturer specs and buyer photos, and it's the lowest fly skirt in the 3-season category. That coverage blocks horizontal rain and ground splash.
The tent uses Easton Syclone poles that flex rather than snap in wind gusts. Buyers in Oregon and Washington (notoriously wet climates) report no leaks through 3-day storms. The single vestibule is large enough for a pack and boots but gets crowded with two people's gear. At 3 lbs 7 oz, it's slightly heavier than the Copper Spur but still backpack-friendly. The stuff sack compresses to the size of a Nalgene bottle.
✅ Pros:
- Freestanding architecture allows complete assembly under cover
- Industry-leading fly coverage for horizontal rain protection
- Proven durability in Pacific Northwest conditions
❌ Cons:
- Single vestibule limits gear storage for two people
- No fly-first pitch option—requires tarp method in heavy rain
TETON Sports Mountain Ultra Tent
| Criteria | Score |
|----------|-------|
| Setup Speed | 6/10 |
| Rain Protection | 8/10 |
| Weight | 5/10 |
| Value | 10/10 |
For backpackers on a budget or newcomers learning rain-setup skills, the TETON Mountain Ultra delivers solid performance at $89.99. The full-coverage fly reaches the ground on all sides, creating a bathtub effect that keeps rain out even when setup isn't perfect. The pole structure is simple—two main poles plus a spreader bar—so there's less to fumble with in the rain.
Setup takes around 10 minutes for a solo camper, which is slower than premium tents but acceptable given the price. The tent weighs 5 lbs—fine for car camping or short backpacking trips, but too heavy for long-distance hiking. Buyers report good performance in spring and fall rain, though the single-wall construction (tent body plus fly without a gap) can lead to condensation on humid nights. For the cost of one premium tent, you can buy five of these, making it ideal for groups, Scout troops, or anyone testing the waters of backpacking.
✅ Pros:
- $89.99 price removes the financial barrier for beginners
- Ground-reaching fly forgives setup mistakes
- Simple pole system reduces rain-setup complexity
❌ Cons:
- 5 lbs is heavy for serious backpacking
- Condensation issues in humid conditions due to minimal ventilation
Common Rain-Setup Mistakes to Avoid
Pitching tent-first without a tarp. This is the number-one error. The tent floor absorbs water during the 5-10 minutes you're assembling poles and attaching the fly. Even "waterproof" floors leak at seams when saturated. Always establish overhead cover first unless your tent supports fly-first pitching.
Leaving the tent footprint larger than the tent floor. Beginners assume more coverage is better, but an oversized footprint channels rain underneath the tent. Fold or trim the footprint so it's 2 inches smaller than the tent floor on all sides.
Loose guylines and fly tension. A saggy fly collects water in pockets that eventually drip through seams or overflow onto the tent body. Stake guylines at 45-degree angles and tighten until the fly fabric is drum-tight. Re-tension after 30 minutes as the fabric stretches when wet.
Storing wet gear inside the sleeping area. Wet boots, jackets, and packs belong in the vestibule, not the tent interior. Moisture from damp gear raises humidity inside the tent, causing condensation on the fly that drips back down. Keep the sleeping area sacred.
Ignoring drainage. A flat campsite looks perfect until water pools around your tent at 2 AM. Look for subtle slopes and natural channels even when the ground seems level. A 1-2 degree slope is ideal—enough for drainage without rolling off your pad.
Frequently Asked Questions
Can I pitch the tent fly-first without a tarp?
Yes, if your tent is designed for it. The Big Agnes Copper Spur, Nemo Hornet, and MSR FreeLite explicitly support fly-first pitching—you stake out the fly, then clip the inner tent to it from underneath while staying dry. Check your tent's manual; most budget tents don't support this method because the fly requires the tent body's structure to pitch properly. If fly-first isn't an option, use the tarp method.
What's the minimum tarp size for a 2-person tent?
A 10x10-foot tarp covers most 2-person tents with workspace on all sides. Smaller 8x10 tarps work but leave little room for maneuvering. Larger 12x12 tarps are overkill unless you're camping with multiple tents or need a communal cooking area. Silnylon and silpoly tarps pack lighter than polyethylene (hardware-store) tarps—6-8 oz versus 2-3 lbs.
How do I keep my sleeping bag dry while transferring it from pack to tent?
Use a waterproof stuff sack (silnylon or eVent fabric) for your sleeping bag inside your main pack. When you're ready to transfer gear, stay under the tarp and move the stuff sack directly from pack to tent vestibule without opening it. Once inside the tent with the door zipped, open the stuff sack and spread the bag. Compression sacks are not waterproof—they're designed to reduce volume, not keep moisture out.
Should I dig a trench around my tent in heavy rain?
No. Trenching was common practice decades ago but it's now prohibited in most wilderness areas because it causes erosion and damages vegetation. Modern tent designs with full-coverage flies and proper site selection make trenching unnecessary. If water is pooling around your tent, you chose a bad site—move to higher ground rather than digging.
What if there are no trees for a tarp ridgeline?
Use trekking poles as tarp supports. Most lightweight tarps have pole sleeves or loops at the peak. Set two trekking poles 10-12 feet apart, extend them to full height, and drape the tarp over them. Stake out the corners and sides. This creates an A-frame or lean-to configuration. Alternatively, pitch the tarp low to the ground on one side ("porch" style) for wind protection and stake the high side to poles.
Final Thoughts
Setting up camp in rain doesn't have to mean sleeping in damp gear. The tarp-first method keeps your tent floor, sleeping bag, and pack dry by establishing overhead cover before you start assembling the tent. We've seen this approach used from the Appalachian Trail to the High Sierra—it works across all tent designs and price points.
The technique requires minimal extra gear: a lightweight tarp, 20 feet of paracord, and a few extra stakes. Total added weight is under 1 lb for ultralight tarps. The time investment is negligible—once you've practiced the sequence, setup takes 15 minutes total, versus 20+ minutes for tent-first pitching that leaves gear exposed.
Choose a tent with fast setup features and generous vestibule space. Prioritize fly coverage over weight if you camp frequently in wet climates. Practice the sequence at home so muscle memory takes over when conditions are miserable. A dry campsite transforms a challenging day into a comfortable night.
Editor's Choice
Big Agnes Copper Spur HV UL2 — Fly-first pitch capability and sub-5-minute setup make this the best tent for backpackers who regularly face rain and need speed without sacrificing comfort.
MSR Hubba Hubba NX 2 — Freestanding design and industry-leading fly coverage deliver bomber rain protection for campers who prioritize weather performance over ultralight weight.
TETON Sports Mountain Ultra Tent — Budget-friendly entry point with full ground coverage and simple setup for new backpackers learning rain-setup skills without a premium investment.