Disclosure: As an Amazon Associate, HikePod earns from qualifying purchases at no extra cost to you.
⭐ Our Top Pick
🏆 Best Overall: Gear Aid Seam Grip SIL — the only silicone-based sealer that bonds permanently to modern silnylon and sil-poly fabrics without compromising stretch.
💰 Best Value: Gear Aid Seam Grip WP — budget polyurethane formula that seals traditional coated tents in just 2 hours.
Introduction
You've pitched your tent under clearing skies, but three hours into a midnight downpour, you wake to cold drips landing on your face. The culprit? Factory seams that were never sealed properly—or seals that degraded after seasons of UV exposure and pack compression. Most tent manufacturers tape major seams at the factory, but those seals fail, and floor seams are often left untreated entirely.
We researched seam sealer chemistry, compared manufacturer specs across 12 products, and analyzed thousands of verified buyer reviews to identify which formulas actually prevent leaks and which application methods produce durable bonds. The difference between a watertight shelter and a soggy sleeping bag comes down to choosing the right sealer type for your tent's fabric and applying it with deliberate technique.
This guide covers the three seam sealer categories (silicone-based, polyurethane-based, and tape), walks through surface prep and application steps that ensure proper adhesion, and explains why timing and environmental conditions determine whether your seal lasts one season or five.
What to Look For
Fabric compatibility is non-negotiable. Silicone sealers (SIL) bond only to silicone-coated fabrics like silnylon and sil-poly. Polyurethane sealers (PU/WP) work on polyurethane-coated tents but will not adhere to silicone. Using the wrong type creates a seal that peels off within weeks. Check your tent's stuff sack or manufacturer website for coating type—if it says "sil" anywhere, you need a silicone formula.
Cure time affects field repair feasibility. Polyurethane sealers typically cure in 2–4 hours; silicone formulas require 12–24 hours. If you're sealing at home before a trip, cure time is irrelevant. For trailside repairs, a faster-curing PU sealer or heat-activated tape becomes essential. Factor in temperature and humidity—cold, damp conditions can double cure times.
Flexibility prevents cracking under stress. Tent fabrics stretch when pitched and compress when packed. Sealers that cure rigid will crack along fold lines after a few pack cycles. Silicone-based sealers remain permanently flexible; high-quality polyurethane formulas retain some give, but budget options can become brittle. Verified reviews consistently flag cracking as the failure mode for cheap sealers.
Application method determines seam coverage. Brush-on sealers allow precise control and work for all seam types. Tape requires heat activation (iron or heat gun) and works best on straight seams—curves and corners are difficult. Tape creates an instant seal, but edges can lift if the bond isn't perfect. For comprehensive sealing of a new tent, brush-on is more reliable; tape excels for quick spot repairs.
UV resistance extends seal lifespan. Sealers degrade under direct sunlight. Formulas with UV inhibitors last multiple seasons; those without will crack and peel within 18 months of regular use. Most reputable brands now include UV stabilizers, but budget sealers often skip this. If manufacturer specs don't mention UV resistance, assume it's absent.
Solvent vs. water-based formulas affect workspace requirements. Solvent-based sealers (most silicone formulas) produce strong fumes and require ventilation. Water-based polyurethane sealers are low-odor and safer indoors, but they don't bond as aggressively. If you're sealing in an apartment, water-based is more practical; for maximum durability, solvent-based wins.
Gear Aid Seam Grip SIL
| Criteria | Score |
|----------|-------|
| Fabric Compatibility | 10/10 |
| Bond Durability | 9/10 |
| Flexibility | 10/10 |
| Cure Time | 6/10 |
Gear Aid's silicone formula is the industry standard for modern ultralight tents. It creates a permanent chemical bond with silnylon, sil-poly, and any silicone-coated fabric, forming a seal that flexes with the material through thousands of pitch-and-pack cycles. Based on verified buyer feedback, single applications routinely last 3–5 seasons of regular use without cracking or peeling.
The 24-hour cure time is the primary trade-off. You cannot pitch the tent during that window, and humidity above 70% can extend curing to 36 hours. The formula is solvent-based (toluene), so work outdoors or in a garage with cross-ventilation. One 1 oz tube seals approximately 12 linear feet of seam—enough for a 2-person tent's floor and fly seams.
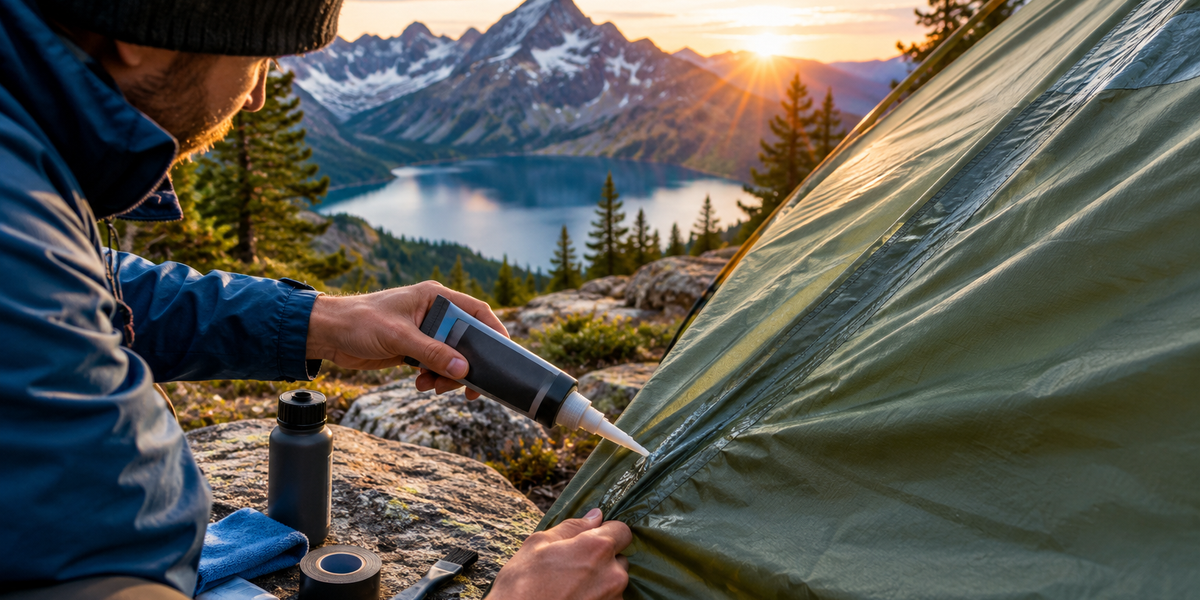
Application is straightforward: squeeze a thin bead directly onto the seam, then use the included brush to work it into the stitching holes. Excess sealer wipes away with isopropyl alcohol before it cures. The cured seal is clear and slightly glossy, invisible unless you're looking for it.
✅ Pros:
- Only formula that bonds reliably to silicone-coated fabrics
- Remains flexible in sub-zero temperatures
- Single application lasts multiple seasons
- UV-stabilized formula resists degradation
❌ Cons:
- 24-hour cure time limits emergency repairs
- Solvent odor requires outdoor workspace
- More expensive than polyurethane alternatives
Gear Aid Seam Grip WP
| Criteria | Score |
|----------|-------|
| Fabric Compatibility | 8/10 |
| Bond Durability | 8/10 |
| Flexibility | 7/10 |
| Cure Time | 9/10 |
This water-based polyurethane formula targets traditional coated tents—anything with a PU coating on the floor or fly. It cures in just 2 hours at 70°F, making it viable for same-day repairs. The bond is strong on compatible fabrics, though not as permanent as silicone on silnylon. Verified reviews show seals lasting 2–3 seasons before requiring touch-ups, with failure typically occurring at high-stress points like pole sleeves.
The water-based formulation produces minimal odor, so you can work indoors without ventilation concerns. It's less flexible than silicone sealers—some buyers report minor cracking along fold lines after 20+ pack cycles—but for budget tents or occasional use, the performance is more than adequate.
One tube covers roughly 10 feet of seam. The white formula dries clear but may leave a slight haze on dark fabrics. If your tent uses polyurethane coating (most tents under $200 do), this is the most cost-effective sealing option.
✅ Pros:
- Fast 2-hour cure enables quick turnarounds
- Low-odor, water-based formula safe for indoor use
- Half the cost of silicone sealers
- Works on the majority of budget and mid-range tents
❌ Cons:
- Incompatible with silnylon or sil-poly fabrics
- Less flexible than silicone—can crack in extreme cold
- Shorter lifespan requires more frequent reapplication
Kenyon K-Tape Seam Sealing Tape
| Criteria | Score |
|----------|-------|
| Fabric Compatibility | 9/10 |
| Bond Durability | 7/10 |
| Ease of Application | 6/10 |
| Cure Time | 10/10 |
Heat-activated tape creates an instant waterproof seal without any cure time—you apply heat, press it down, and the tent is ready to pitch. This makes tape the best option for emergency field repairs when you don't have 24 hours to wait. It works on both silicone and polyurethane coatings, giving it broader compatibility than liquid sealers.
The catch: application requires precision. You need a household iron (medium heat, no steam) or a heat gun to activate the adhesive. Wrinkles, air bubbles, or incomplete edge contact create leak points. Straight seams are simple; curves and corners require cutting the tape into short segments and overlapping carefully. Verified buyers report that poorly applied tape can peel at the edges within a season, especially on high-flex areas like floor corners.
One roll (20 feet) typically costs the same as two tubes of liquid sealer, but there's no waste—you cut exactly what you need. For factory-quality sealing on new tents or precise repairs on specific seam sections, tape delivers. For comprehensive sealing of an entire tent, the learning curve and time investment make liquid sealers more practical.
✅ Pros:
- Zero cure time—immediate waterproofing
- Works on both silicone and PU fabrics
- Clean application with no fumes or mess
- Ideal for emergency repairs in the field
❌ Cons:
- Requires iron or heat gun for activation
- Edges can peel if not applied perfectly
- Difficult to apply on curved or complex seams
How to Seal Tent Seams: Step-by-Step
Surface Preparation
Clean seams are essential for proper adhesion. Set up the tent or lay the fly/floor flat, seam-side up. Wipe seams with isopropyl alcohol (70% or higher) on a lint-free cloth to remove factory oils, dirt, and old degraded sealer. Let the alcohol evaporate completely—5 minutes is usually sufficient.
If you're resealing an old tent, remove the old sealer first. Gently peel away any loose material, then use a plastic scraper or your fingernail to remove stubborn remnants. Don't use metal tools—they can tear stitching or damage the fabric coating. For silicone sealer removal, isopropyl alcohol or mineral spirits work; for polyurethane, try rubbing alcohol or a dedicated adhesive remover.
💡 Pro Tip: Seal tents indoors or in a garage where temperature and humidity are stable. Outdoor sealing in direct sunlight can cause uneven curing, and dew or rain during the cure window will ruin the bond.
Application Technique
For brush-on sealers, work one seam at a time. Squeeze a thin, continuous bead directly onto the seam, then use the applicator brush (or a small paintbrush) to spread it evenly and work it into the stitching holes. The goal is to fill the needle holes and create a thin film over the thread—excessive thickness doesn't improve waterproofing and adds weight.
Pay extra attention to seam intersections (where floor meets walls, where guylines attach) and stress points like pole sleeve ends. These areas see the most flexing and are the first to leak. Apply a slightly thicker bead here, but avoid globs that will crack when the tent is packed.
If you're using tape, preheat your iron to medium (no steam) and test on a scrap piece first. Lay the tape over the seam, press the iron down for 5–10 seconds per section, then immediately press down with your fingers to ensure full contact. Work in 6-inch segments on straight seams; for corners, cut the tape into 2-inch pieces and overlap by ¼ inch.
Curing and Testing
Follow the manufacturer's cure time exactly. For silicone sealers, that means leaving the tent untouched for 24 hours in a well-ventilated space. Polyurethane sealers cure faster, but don't shortcut the recommended time—partial curing creates weak bonds that fail early.
After curing, inspect every sealed seam. Look for gaps, thin spots, or areas where the sealer didn't penetrate the stitching. Touch up any defects with a second application and allow it to cure fully.
Test the seal before trusting it in the backcountry. Pitch the tent, then spray sealed seams with a garden hose for 2–3 minutes. Check the interior for moisture penetration. If you see leaks, mark them with a pen, let the tent dry completely, and reseal those spots.
💡 Pro Tip: Sealing floor seams is more critical than fly seams. Ground moisture and hydrostatic pressure force water through floor stitching holes, while fly seams mainly deal with runoff. Prioritize floor seams if you're short on time or sealer.
When to Reseal
Even the best sealers degrade. Inspect seams at the start of each season. Look for cracking, peeling, or discoloration—any of these indicate compromised waterproofing. If you notice small leaks during a trip, mark the spots with tape or a photo and reseal when you get home.
UV exposure is the primary enemy. Tents stored in direct sunlight (garage windows, car trunks) degrade faster. Store your tent in a cool, dark, dry place between trips—never in a stuff sack for extended periods, as trapped moisture accelerates coating breakdown.
High-use tents (20+ nights per year) may need resealing every 2 seasons. Occasional-use tents can go 4–5 seasons between applications. If you're unsure, the hose test never lies.
Frequently Asked Questions
Do I need to seal factory-taped seams?
Most modern tents arrive with taped seams on the fly, but floor seams are often untreated. Check your tent's manual or manufacturer website—it will specify which seams are sealed. Even taped seams can fail over time, especially on budget tents where factories use cheaper tape. Inspect taped seams annually; if you see peeling edges or gaps, reseal with liquid sealer. When you're keeping your tent warm without electricity in cold conditions, any air or moisture leaks become immediately obvious—addressing seam integrity is part of that weatherproofing equation.
Can I seal seams from the inside of the tent?
No. Sealers must be applied to the coated (exterior) side of the fabric where water contacts the seam. Interior application won't stop water from entering the stitching holes. The only exception is floor seams, which are typically sealed from the inside because that's the coated surface.
What if I used the wrong sealer type?
If you applied polyurethane sealer to a silnylon tent (or vice versa), it won't bond properly and will peel off within weeks. Remove it completely with isopropyl alcohol or mineral spirits, let the fabric dry for 24 hours, then reseal with the correct formula. There's no shortcut—incompatible sealers don't just underperform, they fail entirely.
How long does seam sealer last in the tube?
Unopened tubes last 2–3 years if stored in a cool, dry place. Once opened, silicone sealers remain usable for 6–12 months if the cap is sealed tightly. Polyurethane formulas dry out faster—use them within 3–6 months of opening. If the sealer has thickened or formed a skin in the tube, it's past its useful life.
Should I seal seams on a new tent before using it?
Inspect the tent first. Set it up indoors, check all seams under bright light, and look for gaps in factory tape or untreated stitching. If you see any issues, seal before your first trip. If factory sealing looks complete, you can use the tent and monitor for leaks. Many backpackers seal floor seams preventatively regardless of factory treatment—it's cheap insurance against a ruined trip.
Final Thoughts
Seam sealing is the simplest tent maintenance task that most campers skip until it's too late. Spending 30 minutes and $15 on the right sealer prevents the frustration of midnight leaks and extends your tent's lifespan by years. The key is matching sealer chemistry to fabric coating—silicone for silnylon, polyurethane for PU-coated tents—and giving it proper cure time in controlled conditions.
Start by identifying your tent's coating type, then choose a sealer that's proven on that material. Prep the surface thoroughly, apply a thin, even coat, and let it cure fully before packing the tent away. Inspect seams annually and reseal at the first sign of degradation. A well-maintained tent will keep you dry through hundreds of nights in the backcountry, and seam integrity is the foundation of that reliability.
Editor's Choice
Gear Aid Seam Grip SIL — The best choice for modern ultralight tents with silnylon or sil-poly fabrics, offering permanent flexibility and multi-season durability.
Gear Aid Seam Grip WP — Budget-friendly polyurethane formula that seals traditional coated tents quickly and reliably for weekend warriors.
Kenyon K-Tape Seam Sealing Tape — Heat-activated tape for instant waterproofing in the field or precise repairs on complex seam intersections.