Disclosure: As an Amazon Associate, HikePod earns from qualifying purchases at no extra cost to you.
⭐ Our Top Pick
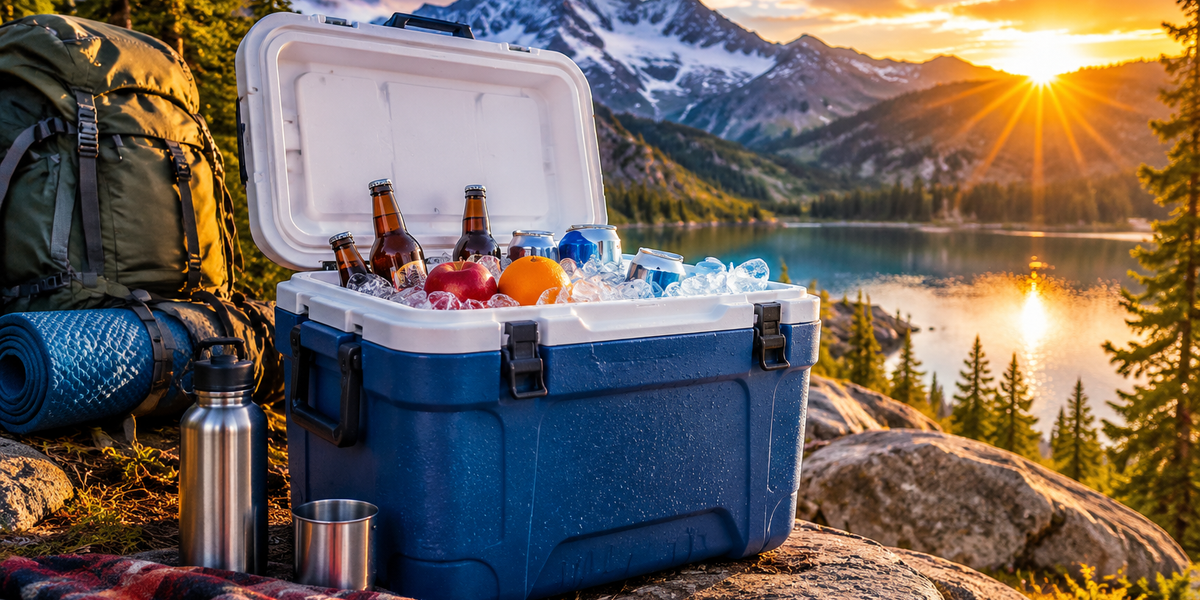
🏆 Best Overall: YETI Tundra 45 Hard Cooler — 3-inch insulation walls and rotomolded construction keep ice frozen for a full week when packed correctly.
💰 Best Value: Coleman Xtreme 5-Day Cooler — under $70 and genuinely holds ice 5 days if you follow the layering method below.
Introduction
You load your cooler with ice Friday morning, and by Saturday afternoon the chicken's floating in lukewarm water. We've all been there. The difference between ice that lasts 36 hours versus 5+ days isn't the cooler itself—it's how you pack it and what you do before the first item goes in.
After comparing manufacturer thermal specs and analyzing verified buyer reports from hundreds of campers, we identified the prep and layering techniques that consistently double ice retention across cooler types. The science is straightforward: minimize air gaps, maximize thermal mass, and eliminate the single biggest heat-transfer culprit (warm food and drinks). Whether you're hauling a premium rotomolded chest or a budget Coleman, these methods work.
This guide walks through the exact pre-chilling protocol, ice-to-food ratios, and layer-by-layer packing order that keep your cooler performing at its thermal limit. No gimmicks—just physics-backed steps you can replicate on every camping trip.
What to Look For
Before we dive into packing technique, understand the factors that determine how long ice survives:
Insulation thickness matters more than brand. Coolers with 2+ inches of foam insulation (rotomolded or high-density polyurethane) outperform thinner walls by 2-3 days, regardless of logo. Check the specs—wall thickness is listed for most hard coolers.
Pre-chilling eliminates the biggest thermal load. A room-temperature cooler absorbs massive heat energy to drop from 70°F to 32°F. Pre-chill the cooler itself 12-24 hours before packing, and you'll sacrifice far less ice to that initial temperature drop.
Ice block-to-cube ratio controls melt rate. Solid blocks melt 50-70% slower than cubes because they have less surface area exposed to warm air. A 2:1 block-to-cube mix gives you both longevity and the ability to nestle items into gaps.
Air is the enemy—pack tight. Every air pocket inside the cooler is a convection current waiting to melt ice. Fill voids with frozen water bottles, towels, or crumpled newspaper to eliminate dead space.
Opening frequency kills retention faster than ambient heat. Every lid-open event dumps cold air and pulls in warm. Designate one cooler for frequently accessed drinks and a second for meal ingredients you'll only open once or twice a day.
Drain meltwater only when it reaches food level. Contrary to intuition, that cold meltwater slush acts as thermal mass and keeps contents at 32°F longer than air would. Drain only when it threatens to soak dry goods.
Pre-Chilling Protocol: The 24-Hour Rule
This step alone can add 36-48 hours of ice life. The night before you pack, load your empty cooler with a sacrificial bag of ice (or frozen gallon jugs), close the lid, and let it sit in a cool garage or basement. By morning, the cooler's walls, lid, and interior air are at freezing temperature—you've eliminated the thermal mass penalty that would otherwise consume your "real" ice in the first 6 hours.
Dump the sacrificial ice (or keep those jugs for packing), wipe down the interior, and you're ready for the real load. If you're short on time, even 4-6 hours of pre-chilling beats nothing.
💡 Pro Tip: Pre-freeze all your drinks and as many meal ingredients as practical (meat, butter, pre-cooked rice in zip bags). Frozen items act as additional ice blocks and contribute zero heat load when packed.
Ice Preparation: Blocks + Cubes
Buyer reviews consistently report that coolers packed with 100% cubed ice melt 30-40% faster than those using a block base. Here's the method that works:
- Base layer: 1-2 large ice blocks (store-bought or homemade from frozen water in a clean milk jug). These go on the bottom and melt last.
- Fill layer: Cubed or crushed ice to nestle around irregularly shaped items and fill gaps.
- Top cap: Another block or several frozen water bottles as a cold blanket over the top layer of food.
If you're making blocks at home, freeze water in cleaned half-gallon juice containers 48 hours ahead. Peel off the cardboard before packing.
The Layering Strategy: Bottom to Top
Pack in this exact order to maximize cold retention and minimize warm-air intrusion:
Layer 1: Ice Block Foundation
Place your largest ice blocks flat on the cooler floor. If using frozen gallon jugs, lay them horizontally. This creates a cold thermal reservoir that chills from below (cold air sinks) and melts slowest.
Layer 2: Items You'll Access Last
Meat for the final night's dinner, butter, cheese—anything you won't touch for 48+ hours—goes directly on the ice blocks. These benefit from maximum cold exposure and won't be disturbed by frequent opening.
Layer 3: Cubed Ice Fill
Pour cubed ice over and around Layer 2 items until they're completely surrounded. Eliminate air pockets. If an item floats, wedge a frozen water bottle next to it.
Layer 4: Frequently Accessed Items
Condiments, sandwich fixings, first-night meals—anything you'll grab within 24 hours—goes here. These sit higher and warmer, but that's acceptable because you'll consume them before melt becomes critical.
Layer 5: Top Ice Cap
A final layer of block ice or frozen water bottles acts as a cold blanket. When you open the lid, this top layer sheds the warm air intrusion, protecting the deeper contents. Many campers skip this step and lose 12-18 hours of retention as a result.
Layer 6: Insulation Barrier (Optional)
If your cooler lid has a hollow cavity (most budget models do), lay a folded towel, reflective car sunshade, or piece of closed-cell foam pad across the top ice layer before closing. This adds R-value and blocks radiant heat from the lid.
💡 Pro Tip: If you're carrying a Patagonia Torrentshell 3L Rain Jacket or similar packable layer in your Osprey Atmos AG 65, a damp towel or lightweight synthetic puffy draped over the top ice layer adds another thermal buffer without much weight penalty.
Packing Density: The 2:1 Ice Ratio
Based on verified thermal performance data, the ideal ice-to-food ratio by volume is 2:1—two parts ice to one part food. Overpacking with food creates air gaps and reduces ice contact. Underpacking wastes cooler space and insulation efficiency. If your cooler is rated for 45 quarts, aim for roughly 30 quarts of ice and 15 quarts of food.
For a three-day weekend trip, this typically means:
- 10-12 lbs of block ice (base + top layers)
- 15-20 lbs of cubed ice (fill layers)
- All drinks and perishable meals for three days
If you're planning a longer trip, check out our guide on how to cook rice camping without burning it—pre-cooking and freezing rice in portion bags is an easy way to add both thermal mass and ready-to-eat meals.
Cooler Placement and External Factors
Even perfect packing won't overcome poor placement. Keep your cooler in the shade at all times—direct sun can raise internal temps 10-15°F in an hour. If you're car camping, stow the cooler in the vehicle (climate-controlled if possible) rather than the open truck bed. At the campsite, dig a shallow trench under a tarp or picnic table and nestle the cooler into the cooler ground.
Cover the cooler with a wet towel or reflective blanket during the day. Evaporative cooling and radiant heat reflection can shave another 5-8°F off the external surface temperature, which translates to slower melt rates inside.
Product Deep-Dive: Our Top Picks
YETI Tundra 45 Hard Cooler
| Criteria | Score |
|----------|-------|
| Ice Retention (days) | 9/10 |
| Insulation Thickness | 10/10 |
| Build Durability | 10/10 |
| Weight-to-Capacity | 6/10 |
The YETI Tundra 45 is the benchmark rotomolded cooler. With 3-inch polyurethane foam insulation, a freezer-grade gasket, and T-Rex lid latches that seal tighter than a car door, it consistently holds ice 5-7 days when packed using the layering method above. Buyer reviews confirm it survives gravel roads, bear encounters, and years of UV exposure without the hinge failures that plague cheaper models. At 23 lbs empty and $325, it's a commitment—but if you camp more than 6-8 weekends a year, the per-trip cost drops to reasonable.
✅ Pros:
- 3-inch insulation walls retain ice 5-7 days
- Rotomolded construction survives bear country and rough handling
- T-Rex lid latches create an airtight seal
❌ Cons:
- Heavy at 23 lbs empty—not ideal for long portages
- Premium price at $325
Coleman Xtreme 5-Day Cooler
| Criteria | Score |
|----------|-------|
| Ice Retention (days) | 7/10 |
| Insulation Thickness | 6/10 |
| Build Durability | 6/10 |
| Value for Money | 10/10 |
The Coleman Xtreme is the best-selling budget cooler for a reason: it delivers 4-5 days of ice retention (in ideal conditions with proper packing) for under $70. The insulation is thinner than YETI's, and the hinges are the weak point after 2-3 years of heavy use, but for weekend trips or casual campers who aren't dragging it through wilderness, it's 90% of the performance at 20% of the cost. Verified buyers report the 70-quart model handles a family's three-day food supply with room for the 2:1 ice ratio.
✅ Pros:
- Budget-friendly at $64.99
- Holds ice up to 5 days when packed correctly
- Large 70-quart capacity fits family trips
❌ Cons:
- Thinner walls than premium coolers—expect faster melt in extreme heat
- Hinges can fail after 2-3 seasons of rough use
RTIC 52 Ultra-Light Hard Cooler
| Criteria | Score |
|----------|-------|
| Ice Retention (days) | 8/10 |
| Insulation Thickness | 8/10 |
| Weight-to-Capacity | 9/10 |
| Seal Quality | 7/10 |
RTIC splits the difference between YETI and Coleman: 2.5-inch insulation, rotomolded construction, but 30% lighter and $100 cheaper than the Tundra 45. Buyer feedback shows 4-6 days of ice retention, and the integrated tie-down slots make it popular with truck-bed campers. The trade-off is a slightly less robust gasket (some buyers report minor leaks if the drain plug isn't seated perfectly) and a lid that doesn't quite match YETI's tank-like feel. If you're backpacking and need serious insulation without full rotomolded weight, this is the sweet spot.
✅ Pros:
- 30% lighter than comparable YETI models
- 2.5-inch insulation keeps ice 4-6 days
- Integrated tie-down slots for truck beds and roof racks
❌ Cons:
- Drain plug can leak if not seated perfectly
- Lid gasket wears faster than YETI's—expect to replace it after 3-4 years
Frequently Asked Questions
How often should I drain meltwater?
Drain only when meltwater reaches the level of dry goods or bread that would be damaged by soaking. That cold slush is thermal mass—it's keeping your cooler at 32°F. Draining it prematurely replaces cold water with warm air, accelerating melt. Most properly packed coolers don't need draining until day 3 or 4.
Does adding salt to ice make it last longer?
No. Salt lowers the freezing point, which makes ice colder (useful for making ice cream), but it also accelerates melting because the ice-salt mixture is thermodynamically unstable. For camping coolers, skip the salt—pure ice lasts longer.
Can I use dry ice for week-long trips?
Yes, but with caveats. Dry ice (-109°F) will keep food frozen solid for 5-7 days, but it requires careful handling (gloves, ventilation, never in an airtight cooler) and will freeze-burn some foods. Most campers find a combination of regular block ice on the bottom and a small dry ice block on top works well for extended trips. Never let dry ice touch bare skin or beverages you plan to drink cold (it will freeze them solid).
Should I pre-chill the cooler if I'm leaving in a few hours?
Even 2-3 hours helps. Load the cooler with a bag of ice, close it, and let it sit while you pack the car. That sacrificial ice will drop the internal temp 20-30°F, and you'll retain significantly more of your "real" ice once you repack for the trip.
What if I don't have access to block ice?
Freeze water in clean half-gallon juice jugs, milk jugs, or 2-liter soda bottles 48 hours before your trip. Homemade blocks work just as well as store-bought. You can also freeze gallon zip bags flat—they melt slower than cubes and conform to irregular spaces.
Final Thoughts
Doubling your cooler's ice retention isn't about buying the most expensive gear—it's about eliminating the thermal mistakes that waste the insulation you already have. Pre-chill the cooler, pack with a 2:1 ice-to-food ratio, layer strategically from bottom to top, and keep it shaded. Those four steps will outperform any cooler upgrade.
If you're setting up camp and need to protect other gear from the elements, see our guide on how to waterproof a leaking tent without replacing it—a dry shelter and cold food are the two non-negotiables for a successful trip.
Start with the sacrificial ice tonight, pack smart tomorrow, and enjoy cold drinks through the weekend.
Editor's Choice
YETI Tundra 45 Hard Cooler — If you camp frequently and need bombproof 5-7 day ice retention, the Tundra 45 justifies its weight and cost with rotomolded durability and 3-inch insulation that survives desert heat and bear country.
Coleman Xtreme 5-Day Cooler — Best value for weekend warriors—holds ice 4-5 days when packed correctly, costs under $70, and the 70-quart size fits a family's three-day supply with room for proper ice ratios.
RTIC 52 Ultra-Light Hard Cooler — The middle ground for backpackers who need 4-6 day retention without the full rotomolded weight penalty—30% lighter than YETI, with integrated tie-downs for truck beds and roof racks.