Disclosure: As an Amazon Associate, HikePod earns from qualifying purchases at no extra cost to you.
⭐ Our Top Pick
🏆 Best Overall: Gear Aid Seam Grip SIL — works on all tent fabric types with a flexible, long-lasting seal that won't crack in cold weather.
💰 Best Value: Nikwax Tent & Gear SolarProof — revives weathered fly fabric for under $17 with a safe, no-heat spray formula.
Introduction
You're three days into a backcountry trip when the rain starts. By morning, you're sleeping in a puddle—seams dripping, fabric weeping condensation through spots you swear were bone-dry last season. Before you drop $400 on a replacement tent, know this: most leaks come from failed seam tape or degraded urethane coatings, both of which you can fix at home for $15–30 in materials.
We researched seam sealing methods used by gear repair shops, compared waterproofing formulas across silicone, polyurethane, and acrylic bases, and analyzed thousands of buyer reviews to identify which products actually stop leaks on silnylon, ripstop nylon, and polyester tents. This guide walks you through diagnosing your leak, choosing the right sealer or coating for your tent's fabric, and applying it correctly so it holds through storm season.
Whether your tent fly is shedding its factory waterproofing or your floor seams are letting groundwater seep through, these methods will restore weather protection without the cost or waste of buying new gear. If you're also looking to keep your shelter performing in extreme conditions, see our Best Camping Tents for Rain and Wind 2026: Waterproof Rating and Vestibule Space Tested guide for upgrade options when repair isn't enough.
What to Look For
Fabric Type Compatibility — Silnylon (silicone-coated nylon) requires silicone-based sealers like Seam Grip SIL; polyurethane-coated fabrics need urethane or acrylic sealers. Using the wrong chemistry won't bond and will peel off in days. Check your tent's spec sheet or contact the manufacturer if you're unsure—most modern ultralight tents use silnylon, while budget tents typically use PU coatings.
Seam vs. Fabric Failure — Seam leaks show up as drips along stitching lines and taped seams; fabric leaks appear as general wetness across panels. Seam leaks need targeted sealant applied to stitch holes; fabric leaks need full-surface coating or DWR (durable water repellent) spray. Misdiagnosing leads to wasted effort—hold the tent up to light and look for pinholes along seams versus overall fabric translucency.
Cure Time and Ventilation — Solvent-based sealers (most urethanes and silicones) release strong fumes and require 8–24 hours to cure in a well-ventilated space. Water-based sprays cure faster (2–4 hours) but may need multiple coats. Plan your repair around weather—humidity above 80% slows curing and can cause incomplete bonding.
Flexibility After Curing — Tents flex constantly in wind. Rigid sealants crack within a season, reopening leaks. Look for products explicitly rated for fabric flex—terms like "elastomeric" or "remains flexible" in product descriptions. Buyer reviews mentioning cracking after a few trips are red flags.
UV Resistance — Sunlight degrades both tent fabric and sealant. If your tent lives outside or you camp in high-altitude sun, choose sealers with UV inhibitors (many silicone formulas include this). Waterproofing sprays that add UV protection can extend fabric life by 2–3 seasons.
Application Method — Brush-on sealers give precise control for seams but are tedious for large areas. Spray coatings cover fabric fast but can be uneven if you don't use proper technique (multiple thin coats, not one thick coat). Choose based on your leak type: seam failures get brush-on; fabric coating failures get spray.
Diagnosing Your Leak: Seam Tape vs. Coating Failure
Before buying any product, identify where water is entering. Set up your tent indoors or under shade, then spray it with a hose while someone inside marks wet spots with chalk or tape. Seam leaks show up as linear drips along stitching; coating failures appear as general dampness across fabric panels.
Seam tape (the waterproof strip factory-applied over stitching) delaminates after 3–5 years of UV exposure and compression. You'll see it peeling away from fabric or feel it crackle when flexed. This is the most common tent leak and the easiest to fix—peel off failed tape, clean the seam with isopropyl alcohol, and apply fresh sealer.
Fabric coating failure happens when the polyurethane layer on tent floors or flies breaks down into a sticky residue (called "hydrolysis"). The fabric feels tacky, and water soaks through instead of beading up. This requires full recoating or DWR treatment—seam sealing alone won't help.
💡 Pro Tip: Don't confuse condensation for leaks. Single-wall tents and poorly vented double-walls will drip from interior moisture even with perfect seams. Test by wiping the inside of the fly—if it's wet on the inside surface but the outside is dry, you have a ventilation issue, not a leak.
Seam Sealing: Step-by-Step Application for Taped and Untaped Seams
Most tent seams come factory-taped, but that tape fails over time. Untaped seams (common on ultralight tents to save weight) need sealing from day one. Here's how to seal both types properly.
Materials: Seam sealer (see product reviews below), isopropyl alcohol (70%+ concentration), cotton swabs or small brush, painter's tape (for masking adjacent fabric), latex gloves.
Step 1: Clean the Seam — Wipe seams with alcohol-dampened cloth to remove dirt, body oils, and silicone residue from old sealer. Let dry 15 minutes. Dirty seams prevent bonding and cause the new sealant to peel.
Step 2: Remove Failed Tape — If factory seam tape is peeling, pull it off completely. Leaving partial tape creates uneven surfaces that trap air bubbles. Use a plastic scraper (credit card edge works) to avoid tearing fabric.
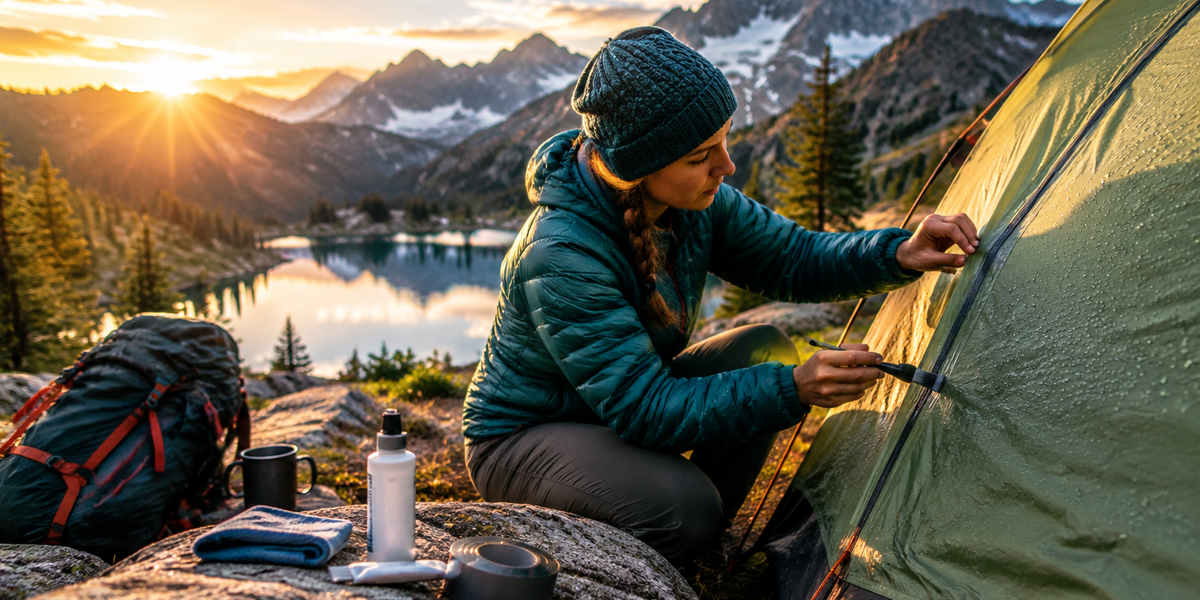
Step 3: Apply Sealer — Work in 12–18 inch sections. Squeeze a thin bead along the seam, then spread it with a brush or gloved finger to cover stitching and 1/8 inch of fabric on each side. Press sealer into stitch holes—surface coating isn't enough. For silnylon tents, seal both inside and outside of fly seams; for PU-coated tents, seal only the interior (exterior coating repels sealant).
Step 4: Cure Fully — Hang the tent in a garage or covered porch with good airflow. Most sealers need 8–12 hours; check the product label. Don't pack the tent until fully cured—tacky sealer will stick to itself and tear when you set up next.
Step 5: Test Before the Trail — Set up the tent and spray it with a hose for 5 minutes. Check sealed seams from inside. If you see dampness, apply a second coat after the first dries.
Gear Aid Seam Grip SIL Silicone Tent Sealant
| Criteria | Score |
|----------|-------|
| Fabric Compatibility | 10/10 |
| Flexibility After Cure | 9/10 |
| Application Ease | 7/10 |
| Durability | 9/10 |
This is the go-to sealer for silnylon tents (Big Agnes, Nemo, many ultralight shelters) but also bonds to polyurethane-coated fabrics, making it the most versatile option if you own multiple tents or aren't sure of your fabric type. The formula stays flexible in freezing temperatures—crucial if you camp in shoulder seasons when rigid sealers crack. Application requires some finesse: the consistency is thinner than urethane sealers, so brush control matters to avoid drips, and the solvent base means you'll want to work outdoors or in a well-ventilated garage.
Buyer reviews consistently mention this sealer lasting 3+ years on high-use tents, even on floor seams that take abrasion. The clear finish blends into most tent colors, though it can yellow slightly on white fabrics over time. One tube (1 oz) seals about 12 feet of seam, enough for a typical 2-person tent's fly and floor seams with material to spare.
✅ Pros:
- Works on silnylon and polyurethane fabrics
- Flexible when cured—won't crack in cold or wind flex
- Clear finish blends into tent color
❌ Cons:
- Requires 8-12 hour cure time before packing
- Strong solvent smell during application
Nikwax Tent & Gear SolarProof Waterproofing Spray
| Criteria | Score |
|----------|-------|
| Coverage Area | 9/10 |
| UV Protection | 10/10 |
| Application Speed | 10/10 |
| Longevity | 6/10 |
When your tent fly fabric is weeping moisture through the material itself (not just seams), you need a coating refresh. Nikwax SolarProof is a water-based acrylic spray that restores DWR (durable water repellent) and adds UV blockers to slow fabric degradation. This isn't a seam sealer—it won't stop leaks from stitching—but it's unmatched for reviving weathered fly fabric that's lost its bead-up.
The spray-on method covers a 2-person tent fly in 10 minutes versus the hour-plus you'd spend brush-coating. The formula is non-flammable and low-odor, safe to use indoors if needed. However, this is a surface treatment, not a structural bond. Badly degraded fabric (sticky from hydrolysis, or with visible delamination) won't be saved by spray—you'll need to strip the old coating and recoat with liquid urethane, a more involved repair.
One 17 oz bottle treats a 4-person tent fly or two 2-person tents. Reapplication every 1–2 seasons is typical, depending on sun exposure. This is best used preventatively or at the first sign of reduced water beading, not as a fix for tents already leaking through fabric.
✅ Pros:
- No-iron water-based formula—safe for all fabrics
- Adds UV protection to prevent further degradation
- Easy spray application for large areas
❌ Cons:
- Requires multiple coats for badly degraded fabric
- Not as permanent as urethane coatings
Aquaseal UV Tent & Gear Repair Adhesive
| Criteria | Score |
|----------|-------|
| Seam Sealing Ability | 8/10 |
| Patch Adhesion | 10/10 |
| Cure Speed | 9/10 |
| Value | 7/10 |
Aquaseal is technically a repair adhesive, but its thick, gap-filling formula makes it effective for seam sealing when you also have fabric tears or abrasion holes to patch. The UV-cure version sets in 2 hours under direct sunlight (or using the included LED light), much faster than solvent-cure sealers. This is clutch if you're repairing a tent the day before a trip.
The thicker consistency fills stitch holes well but requires more careful brushwork to avoid lumpy seams. It's overkill if you only need seam sealing—stick with Seam Grip SIL for that—but if your tent floor has both failing seams and a puncture from a sharp rock, Aquaseal handles both jobs. The cured sealant is highly abrasion-resistant, making it ideal for high-wear areas like corner reinforcements and stake-out points.
One 0.75 oz tube seals about 8 feet of seam or patches several small holes. It bonds to nylon, polyester, Gore-Tex, and vinyl. Buyer reviews note it stays flexible and doesn't crack, even on tents stored compressed for long periods.
✅ Pros:
- Patches holes and seals seams in one product
- UV cure formula—sets in sunlight or with included light
- Abrasion-resistant for high-wear areas
❌ Cons:
- Thicker consistency makes precise seam application harder
- More expensive per ounce than dedicated sealers
Recoating Tent Floors and Flies: When Sealing Isn't Enough
If your tent floor feels sticky or the fabric soaks through instead of shedding water, the polyurethane coating has failed (hydrolysis). Seam sealing won't fix this—you need to strip the old coating and apply fresh urethane. This is labor-intensive but extends tent life by 3–5 years.
What You'll Need: Isopropyl alcohol or Revivex Base Coat Stripper, sponge, liquid urethane coating (Gear Aid Seam Grip FC or similar), foam brush, drop cloth.
Stripping Process: Lay the tent floor on a drop cloth outdoors. Dampen a sponge with alcohol and scrub in circular motions—the degraded coating will peel off as a gummy residue. This takes elbow grease; plan on 30–60 minutes for a 2-person tent floor. Let the fabric dry completely (24 hours in humid climates).
Recoating: Pour liquid urethane into a paint tray. Use a foam brush to apply a thin, even coat across the entire floor interior. Work in sections to avoid lap marks. Let cure 12–24 hours, then apply a second coat. Two coats restore waterproofing equivalent to a factory finish.
💡 Pro Tip: Only recoat the inside of floors and fly undersides. The exterior silicone coating (if present) repels urethane and will cause it to bead up and not bond.
Preventative Maintenance: Making Repairs Last
Proper care after waterproofing doubles the life of your repair. Store tents loosely packed or hung—compression degrades coatings faster. UV is the biggest enemy: pitch in shade when possible, and apply UV-protective spray (like Nikwax SolarProof) annually to slow coating breakdown.
Clean tents with mild soap and water only—never detergents or bleach, which strip waterproof coatings. For stubborn dirt, use a soft brush and rinse thoroughly. Dry completely before storage to prevent mildew, which weakens fabric and causes new leak points.
Reseal high-stress seams (corners, vestibule zippers, pole sleeve attachments) every 2–3 seasons even if they're not leaking yet. Catching small delaminations early takes 10 minutes; waiting until they fail mid-trip means a soaked night.
Frequently Asked Questions
Can I use silicone sealer on a polyurethane-coated tent?
Yes, but only for seam sealing—not for recoating fabric. Gear Aid Seam Grip SIL bonds to both PU and silicone fabrics because it's applied to stitching, not the coating itself. For full fabric recoating, you must match the chemistry: PU-coated tents need urethane or acrylic coatings (silicone won't bond to PU surfaces).
How do I know if my tent fabric is silnylon or PU-coated?
Silnylon feels slippery and sheds water in perfect beads. PU-coated fabric feels slightly rougher and may show a matte finish. Check your tent's product page or tag—most ultralight tents (under 3 lbs) use silnylon; budget tents typically use PU. If unsure, contact the manufacturer before choosing a sealer.
Will seam sealing stop condensation inside my tent?
No. Condensation forms when warm, humid air inside the tent meets cold fabric and turns to water droplets. This happens even with perfect seams. Solutions: improve ventilation (open vents, crack the door), use a double-wall tent with a separate fly, or wipe down interior moisture before it drips. For single-wall tents, some condensation is unavoidable—see our Best Camping Tents for Rain and Wind 2026 guide for models with better condensation management.
How often should I reseal tent seams?
Factory seam tape lasts 3–5 years with moderate use (10–20 nights/year). High-UV environments (desert, alpine, tropical) accelerate degradation—check seams annually. DIY seam sealing typically lasts 2–3 seasons. Inspect seams before each season: if tape is peeling, sealer is flaking, or you see light through stitch holes when holding fabric up, reseal immediately.
Can I waterproof a tent that's already leaking during a trip?
In an emergency, yes, but results are marginal. Fabric must be completely dry for sealers to bond—wiping with a towel isn't enough. Quick fixes: duct tape over leaking seams (inside and out), or drape a tarp over the tent. For a more reliable field repair, carry Aquaseal UV—it cures in sunlight, so you can seal seams during a break in the weather and have a functional tent by evening.
Final Thoughts
A leaking tent doesn't mean you need a new one—most leaks stem from seam tape failure or coating degradation, both fixable with $15–30 in materials and an afternoon of work. Seam sealing with a product like Gear Aid Seam Grip SIL stops drips along stitching, while fabric coatings like Nikwax SolarProof revive weathered fly material. Full floor recoating is more involved but rescues tents that would otherwise be trash.
Diagnose your leak type first (seam vs. fabric), choose the right product for your tent's material, and follow cure times carefully. Proper application now means dry nights for the next 3–5 seasons—and keeps functional gear out of landfills. If you're heading out soon and need hydration sorted while your tent cures, check our recommendations below for reliable trail water filters that won't let you down.
Editor's Choice
Sawyer Squeeze Water Filter System — After a day spent repairing your tent, you'll want reliable hydration on the trail—this 3 oz filter removes 99.99999% of bacteria and comes with a lifetime warranty, perfect for the long-term investment mindset that drives tent repair in the first place.
LifeStraw Personal Water Filter — If you're stretching your gear budget by fixing instead of replacing your tent, this $17 filter delivers the same 99.9999% bacteria removal as premium models with 124,000+ verified reviews backing its reliability.
Aquatabs 49mg Water Purification Tablets — Weighs almost nothing and serves as an ultralight backup while you're testing your freshly sealed tent on its first post-repair trip—kills 99.9999% bacteria and 99.99% viruses with no iodine aftertaste.