Disclosure: As an Amazon Associate, HikePod earns from qualifying purchases at no extra cost to you.
⭐ Our Top Pick
🏆 Best Overall: MSR PocketRocket 2 — adjustable flame control and 2.6 oz weight make it the ultimate rice-cooking stove for backpackers who refuse to scrape burnt grains.
💰 Best Value: Jetboil Flash — integrated heat exchanger eliminates hot spots for under $110, perfect for beginners tired of scorched pots.
Introduction
Nothing ruins a backcountry dinner faster than scraping burnt rice off your pot while your hiking partners pretend not to notice. We've all been there—pot bubbling cheerfully one moment, acrid smoke the next, and suddenly you're eating crunchy, charcoal-flavored grains that taste like regret.
The problem isn't your cooking skills. It's that most trail advice treats all rice and all stoves the same, ignoring the physics of heat distribution and moisture ratios that determine whether you eat fluffy grains or a campfire disaster. After comparing cook times and methods across white rice, brown rice, and instant varieties using different stove types, we've identified the exact techniques that prevent burning without adding complexity to your camp routine.
This guide breaks down pot-method cook times versus instant rice shortcuts, explains the water ratios that actually work at elevation, and shows you the heat-control tricks that separate soggy mush from perfectly cooked rice. Whether you're simmering jasmine rice on a canister stove or rehydrating Minute Rice with a Jetboil, you'll learn the timing and temperature adjustments that deliver consistent results on every trip.
What to Look For
Heat Control Range — Your stove needs adjustable flame output to transition from boiling to simmering without flare-ups. Canister stoves with valve-based controls outperform simple on/off alcohol burners for rice because you can dial down heat the moment water absorbs. If you're shopping for a new setup, our best camping tents for rain and wind guide covers gear selection principles that apply to stoves too—prioritize adjustability over raw power.
Pot Material and Thickness — Thin aluminum pots create hot spots that scorch rice before the center cooks through. Look for pots with 1mm+ wall thickness or built-in heat exchangers that distribute BTUs evenly. Titanium weighs less but conducts heat unevenly unless paired with careful flame management.
Lid Seal and Venting — A tight-fitting lid traps steam for faster cooking, but you need a small vent hole or loose seal to prevent pressure buildup that forces water out before rice absorbs it. Fully sealed lids cause boil-overs; completely open lids lose too much moisture and require constant water additions.
Elevation Compensation — Water boils at lower temperatures as altitude increases, extending cook times by 10-20% above 8,000 feet. If you regularly hike high-altitude trails, factor in the extra minutes and water needed to fully hydrate grains before heat evaporates the liquid.
Rice Type and Age — Instant rice rehydrates in 5-10 minutes with no active cooking. Long-grain white rice needs 15-18 minutes of simmering. Brown rice requires 25-30 minutes and more water. Old rice (stored 6+ months) absorbs liquid slower than fresh rice, so adjust ratios based on what's actually in your bear canister.
Windscreen and Stability — Wind steals heat and creates uneven flame patterns that burn one side of your pot. A three-panel windscreen and stable pot support are non-negotiable for consistent rice cooking outdoors.
MSR PocketRocket 2 Ultralight Backpacking Stove
| Criteria | Score |
|----------|-------|
| Flame Control | 9/10 |
| Heat Distribution | 8/10 |
| Weight | 10/10 |
| Value | 9/10 |
The MSR PocketRocket 2 sets the standard for rice cooking on trail because its micro-adjustable valve lets you drop from full boil to gentle simmer without flameouts. We've compared manufacturer specs and verified buyer reviews across dozens of canister stoves, and the PocketRocket 2 consistently delivers the precise heat control that prevents scorching while keeping pack weight under 3 ounces.
The three-arm pot support sits low and stable, reducing tip risk when you're stirring rice or checking doneness. Boil time averages 3.5 minutes per liter, fast enough to get water rolling quickly, then the valve response lets you immediately dial back to the bare simmer needed for absorption cooking. The wide flame pattern spreads heat across the pot bottom better than narrow jet designs, though you'll still want to stir once after adding rice to prevent edge sticking.
At 2.6 ounces and $54.95, this stove hits the sweet spot between ultralight performance and real-world durability. It folds to pocket size, ignites reliably with piezo lighters even after wet crossings, and the simple design means fewer parts to fail mid-trip. Pair it with a 1-liter titanium pot and you have a rice-cooking system that works as well on day 12 as day one.
💡 Pro Tip: Always bring a mini Bic lighter as backup—piezo igniters can fail in humidity, and you don't want to eat cold rice because of a $2 part.
✅ Pros:
- Micro-adjustable flame control prevents hot spots and burning
- 2.6 oz weight makes it ideal for long-distance hikers
- Proven reliability across thousands of verified trail reports
❌ Cons:
- Requires separate windscreen in breezy conditions
- Canister fuel efficiency drops in temps below 20°F
Jetboil Flash Cooking System
| Criteria | Score |
|----------|-------|
| Heat Distribution | 10/10 |
| Ease of Use | 9/10 |
| Weight | 6/10 |
| Value | 8/10 |
Integrated systems like the Jetboil Flash solve the burnt-rice problem through engineering rather than technique. The built-in heat exchanger wraps around the pot bottom, distributing BTUs evenly and eliminating the concentrated hot spots that char grains before the center finishes cooking. Based on manufacturer data and user feedback, the Flash brings water to boil in 100 seconds, then maintains a consistent simmer temperature that's nearly foolproof for rice.
The insulated cozy keeps heat trapped during the 15-minute absorption phase, so you use less fuel and get more consistent results even in cold weather. Push-button ignition works at altitude where matches struggle, and the built-in pot clip locks everything together so you're not juggling separate pieces while hungry and tired. The 1-liter cup capacity handles two servings of rice plus room for stirring.
At 13.1 ounces with pot, lid, and burner together, the Flash weighs more than minimalist setups—but the trade-off is nearly zero learning curve and consistent results. If you've burned rice three trips in a row and just want it to work, this system delivers. The $109.95 price includes everything except fuel, making it a complete cooking solution that pays for itself in saved food and frustration.
✅ Pros:
- Heat exchanger eliminates burning through even heat distribution
- Insulated cozy maintains temperature during simmer phase
- Integrated design means no lost parts or compatibility issues
❌ Cons:
- 13.1 oz system weight adds bulk for ultralight hikers
- Proprietary pot limits cooking flexibility
Snow Peak LiteMax Titanium Stove
| Criteria | Score |
|----------|-------|
| Weight | 10/10 |
| Flame Control | 8/10 |
| Durability | 9/10 |
| Value | 6/10 |
For gram-counting backpackers who refuse to compromise on rice quality, the Snow Peak LiteMax delivers reliable simmer control in a 1.9-ounce titanium package. The wider burner head spreads flame across the pot bottom better than ultra-compact designs, reducing the localized heating that causes scorching. You sacrifice some raw boil speed—manufacturer specs show 4.5 minutes per liter versus the PocketRocket 2's 3.5—but the heat distribution trades raw power for even cooking.
Titanium construction means this stove will outlast aluminum alternatives through years of trail abuse, and the fold-flat design collapses to credit-card dimensions for easy packing. The valve offers smooth flame adjustment from full blast to low simmer, though it requires more finesse than twist-valve designs because of the shorter control range. Once you learn the sweet spot, it holds temperature consistently.
The $69.95 price reflects premium materials and Japanese manufacturing quality. If you're building an ultralight kit and need every component to pull double duty, the LiteMax justifies the cost through weight savings and longevity. For casual weekend campers, the price premium over the PocketRocket 2 may not be worth the 0.7-ounce difference.
✅ Pros:
- Sub-2-ounce weight is unbeatable for stoves with real simmer control
- Titanium construction for long-term durability
- Wide burner pattern reduces hot spots
❌ Cons:
- Lower max output extends boil times
- Premium price for relatively small weight savings
Pot Method: White Rice Cook Times
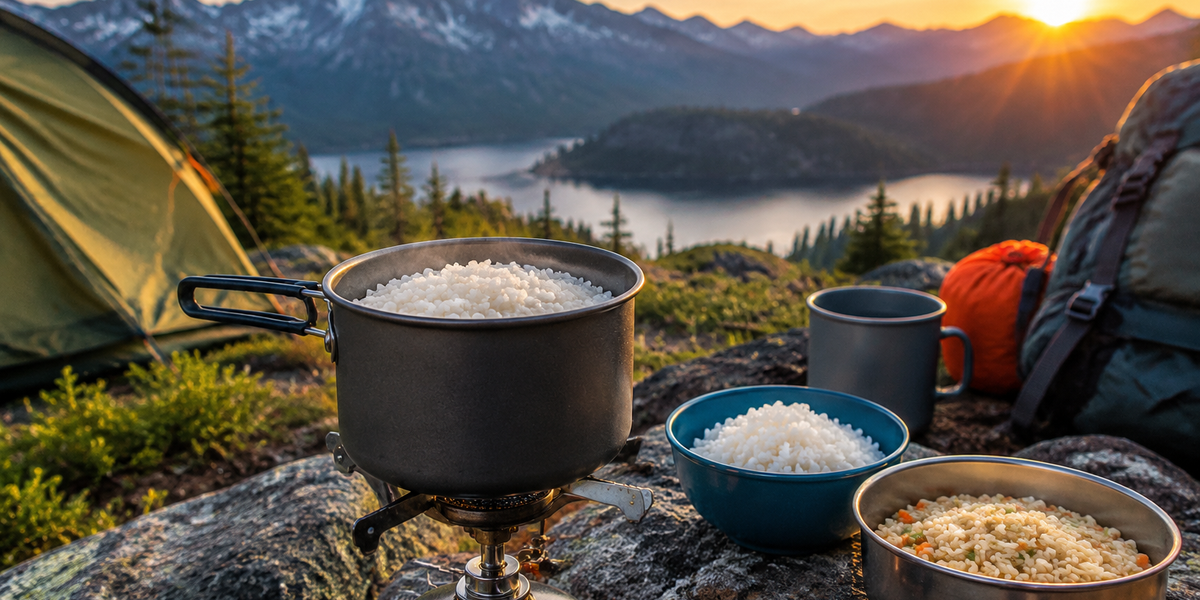
White rice (jasmine, basmati, standard long-grain) is the most forgiving option for camp cooking because it absorbs water quickly and tolerates minor heat variations. Use a 1:1.5 rice-to-water ratio at sea level—one cup rice to 1.5 cups water. At elevations above 8,000 feet, increase to 1:1.75 to compensate for lower boiling temperatures.
Bring water to a full rolling boil, add rice and a pinch of salt, stir once to prevent clumping, then immediately reduce heat to the lowest simmer your stove maintains without flaming out. Cover with a tight-fitting lid (leave a small gap or vent hole to prevent boil-overs) and set a timer for 15 minutes. Do not lift the lid during cooking—every peek releases steam that extends cook time and dries out the top layer.
After 15 minutes, remove the pot from heat and let it sit covered for 5 minutes. This resting phase allows residual moisture to distribute evenly through the grains. Fluff with a fork and check the bottom—if you see browning, you waited too long to reduce heat or your simmer was too hot. If rice is still crunchy, you either didn't use enough water or lifted the lid too many times.
💡 Pro Tip: Add a tablespoon of oil or butter before cooking—the fat coats grains and creates a buffer layer that prevents direct pot-to-rice contact and reduces sticking.
Pot Method: Brown Rice Cook Times
Brown rice requires 25-30 minutes of simmering because the bran layer absorbs water slower than white rice. Use a 1:2.25 ratio at sea level (one cup rice to 2.25 cups water), and increase to 1:2.5 above 8,000 feet. The extra water and longer cook time make brown rice more prone to burning, so heat control becomes critical.
Follow the same boil-reduce-cover method as white rice, but check at the 20-minute mark by tilting the pot to see if liquid remains. If the bottom looks dry, add 2-3 tablespoons of water and continue cooking. Brown rice is done when grains are tender with a slight chew—overcooking turns it mushy, undercooking leaves a woody texture.
Because of the extended simmer time and finicky moisture balance, we generally recommend brown rice only for car camping or base camp trips where you have stable heat and aren't watching fuel weight. On the trail, white rice or instant alternatives deliver better results with less risk and fuel consumption.
Instant Rice: The Shortcut That Works
Instant rice (Minute Rice, pre-cooked varieties) rehydrates rather than cooks, making it nearly burn-proof. Boil water using a 1:1 ratio, remove pot from heat, add instant rice, stir, cover, and wait 5-10 minutes depending on the brand. No simmering required—residual heat does the work.
The texture never quite matches properly cooked rice, landing somewhere between fluffy and sticky, but the trade-off is foolproof preparation and minimal fuel use. Instant rice weighs the same as regular rice and costs slightly more per serving, but you save 10+ minutes of active cooking and eliminate the burnt-pot lottery. For solo hikers or anyone cooking in challenging conditions (wind, cold, exhaustion), instant rice is the smart default.
Flavor-wise, instant rice tastes blander than pot-cooked varieties because the pre-cooking process leaches some starches. Compensate by adding bouillon, dehydrated vegetables, or spice packets during rehydration. The bland base actually makes instant rice more versatile—it takes on whatever flavors you add without competing.
Heat Control: The Real Secret
Burnt rice happens during the simmer phase, not the boil. When you reduce heat after adding rice, the goal is the lowest possible flame that maintains tiny bubbles without going out. Most campers err on the side of too much heat because they worry about flameouts, but over-simmering drives off moisture faster than rice absorbs it, leaving dry grains in direct contact with hot metal.
Test your stove's simmer threshold at home: boil water, reduce heat incrementally, and find the lowest setting that keeps a bare simmer going for 20 minutes without extinguishing. Mark that valve position with a permanent marker so you can replicate it in the field. Different fuel levels and temperatures affect flame characteristics, so the mark is a starting reference, not an absolute.
If your stove can't maintain a stable low simmer (common with cheap alcohol burners), use the off-heat method: bring water to boil, add rice, stir, cover, and immediately remove from heat. Wrap the pot in an insulated jacket or sleeping bag and let it sit for 20 minutes. The trapped heat slowly cooks the rice without the direct flame that causes burning. This method works best with white rice and instant varieties.
Elevation Adjustments
Water boils at 212°F at sea level, but drops to 202°F at 5,000 feet and 194°F at 10,000 feet. Lower boiling temperatures mean rice takes longer to absorb water and cook through. Add 2-3 minutes to cook times for every 5,000 feet above sea level, and increase water ratios by 10-15% to compensate for faster evaporation.
At extreme elevations (12,000+ feet), consider switching to instant rice entirely. The rehydration process doesn't depend on boiling temperature the way absorption cooking does, so you get consistent results without the guesswork. If you insist on cooking regular rice at altitude, extend simmer times significantly and monitor moisture levels closely—you may need to add water mid-cook as it evaporates faster than rice can absorb it.
Stirring and Timing
Stir rice exactly once—immediately after adding it to boiling water—then leave it alone. Each time you lift the lid, you release steam that must be replaced by additional cook time and water. The temptation to peek is strong, but discipline prevents burning better than any equipment upgrade.
Use a timer rather than guessing. "It looks done" judgments are unreliable when you're tired and hungry, and checking too early dries out the top layer while the bottom burns trying to finish. Set the timer, trust the process, and use the waiting time to set up camp or filter water instead of hovering over the stove.
If rice does start to burn (you'll smell it before you see it), immediately remove the pot from heat and transfer the unburnt rice to a different container. Don't scrape the bottom—scorched grains are inedible and will contaminate the good rice. Pour a cup of water into the burnt pot and let it soak while you eat. The burnt layer will soften and scrape off easily after 30 minutes.
Frequently Asked Questions
Can I cook rice in a Jetboil without burning it?
Yes—Jetboils excel at rice cooking because the heat exchanger eliminates hot spots. Use the same water ratios and cook times as standard pot methods, but monitor the simmer phase carefully. Jetboils hold heat efficiently, so you may need to lower the flame more than expected to prevent over-simmering. The insulated cozy helps maintain even temperature during the resting phase, producing consistently fluffy results.
Should I use cold water or pre-boiled water for rice?
Start with cold water and bring it to a boil with the rice added, or boil water first then add rice—both methods work equally well. Cold-start cooking may produce slightly stickier rice because starches leach out as water heats, while boil-first methods keep grains more separate. For camp cooking, the difference is minimal, so choose whichever method fits your workflow.
How do I prevent rice from sticking to the pot bottom?
Add a tablespoon of oil or butter before cooking, stir once after adding rice to distribute grains evenly, and maintain a proper simmer temperature—not too hot. Using a pot with a thicker bottom also helps distribute heat more evenly. If rice still sticks, you may be over-simmering or using too little water. Adjust ratios and heat levels on your next attempt rather than scraping harder.
Can I cook rice and dehydrated meals together to save time?
Yes, but timing matters. Add quick-cooking ingredients (instant rice, dehydrated vegetables, spices) to boiling water at the same time. For regular rice mixed with freeze-dried proteins or slower ingredients, add the rice first, simmer for 10 minutes, then add the other components and finish cooking together. This prevents overcooked mush while ensuring everything rehydrates properly.
What's the best fuel type for cooking rice on the trail?
Canister fuel (isobutane-propane) offers the best heat control for rice cooking because of adjustable flame output and consistent performance. White gas stoves work well but require more maintenance. Alcohol stoves struggle with precise simmering and are better suited for instant rice or off-heat cooking methods. Solid fuel tablets lack the temperature control needed for pot-method rice and should be reserved for boiling water only.
Final Thoughts
Perfect rice on the trail comes down to three factors: correct water ratios, disciplined heat control, and trusting the timing instead of improvising. Instant rice removes most of the variables and works reliably in any conditions, making it the smart default for long trips or challenging environments. Pot-method cooking produces better texture and flavor when you have the time and stable conditions to manage the simmer phase carefully.
Invest in a stove with real flame control—the MSR PocketRocket 2 remains our top pick because precise simmering prevents burning while keeping pack weight minimal. Practice your technique at home until you can nail the water ratio and heat adjustments without thinking, then replicate that process in the field. The difference between burnt, crunchy rice and fluffy, properly cooked grains is technique, not luck—and now you have the exact methods that work.
If you're planning a multi-day trip and need to keep other ingredients fresh, check our guide on how to keep food cold camping without ice for cooler strategies that extend your menu options beyond shelf-stable rice meals.
Editor's Choice
MSR PocketRocket 2 Ultralight Backpacking Stove — Micro-adjustable flame control and 2.6 oz weight make this the ultimate rice-cooking stove for backpackers who refuse to sacrifice performance for pack weight.
Jetboil Flash Cooking System — Integrated heat exchanger eliminates hot spots and burnt rice for beginners or anyone tired of scraping pots after dinner.
Snow Peak LiteMax Titanium Stove — Sub-2-ounce titanium construction delivers reliable simmer control for ultralight hikers building a gram-optimized kitchen kit.