Disclosure: As an Amazon Associate, HikePod earns from qualifying purchases at no extra cost to you.
⭐ Our Top Pick
🏆 Best Overall Strategy: Hybrid Approach (Mail Drops + Town Resupply) — combines the reliability of pre-planned boxes with the flexibility to adapt to trail conditions and cravings.
💰 Best Budget Method: Full Town Resupply — eliminates shipping costs and lets you buy exactly what you need, when you need it, though requires more planning around store locations.
Introduction
After 2,000 miles on the Appalachian Trail and countless conversations with thru-hikers at trail towns, we've learned one universal truth: your resupply strategy can make or break your hike. Run out of food three days from the next town, and you'll be rationing energy bars while watching your pace slow to a crawl. Overshoot your planning and ship too many boxes, and you'll drain your budget on unnecessary postage while eating food you're sick of.
The good news? A solid resupply plan is surprisingly simple once you understand the three main approaches—mail drops, town resupply, and bounce boxes—and how to combine them strategically. We've tested all three methods across the Triple Crown trails, and in this guide, we'll walk you through exactly how to plan your food drops, calculate quantities, time your stops, and avoid the rookie mistakes that leave hikers either hungry or hemorrhaging cash.
Whether you're planning your first thru-hike or refining your strategy for 2026, we'll show you how to stay fueled, save money, and keep your pack weight manageable between towns.
What to Look For in a Resupply Strategy
Flexibility vs. Control — Mail drops give you total control over nutrition and specialty items, but lock you into a schedule. Town resupply offers flexibility to adjust for injuries, weather, or trail family dynamics. The best approach blends both: mail drops for remote sections with limited options, town shopping everywhere else.
Cost Efficiency — Shipping costs add up fast. A single Priority Mail box runs $10-15, and if you're mailing 15-20 boxes for a thru-hike, that's $150-300 before you factor in the food itself. Town resupply often costs more per calorie (gas station markup vs. bulk buying), but eliminates shipping. Calculate your total budget including postage, not just food costs.
Nutritional Density — You need 3,000-5,000 calories per day depending on terrain and your metabolism. Plan for 1.5-2 lbs of food per day, focusing on calorie-dense items (nut butters, oils, dried foods) that won't weigh you down. Your resupply frequency determines how much capacity you need—if you're going 7 days between stops, that's 10-14 lbs of food alone.
Trail Town Logistics — Not all trail towns are created equal. Some have full grocery stores within walking distance; others offer only a gas station 8 miles off-trail. Research each stop's amenities, hours, and hiker services (shuttles, mail drops, hiker boxes) before committing to a resupply point.
Package Timing and Holds — Post offices hold General Delivery packages for 30 days, but if you fall behind schedule, you'll miss your window. Outfitters and hostels often hold boxes longer and offer more flexible pickup times. Always include "HOLD for [Your Name], ETA [date range]" on your boxes and call ahead if you're running late.
Bounce Box Strategy — A bounce box is a single package you mail ahead to your next stop, rotating items you don't need daily (extra clothes, first aid refills, maps). This reduces what you carry while keeping essentials accessible. The trick is keeping it light—don't turn it into a rolling storage unit.
Planning Your Resupply Frequency
Most thru-hikers resupply every 3-5 days, which strikes the balance between pack weight and town frequency. Stretching to 7-10 days between stops is doable on the PCT or CDT where water sources are sparse and you're already carrying extra capacity, but it requires a larger pack and strong back. The Osprey Atmos AG 65 Backpacking Pack is our top choice for longer carries—its Anti-Gravity suspension system distributes weight so efficiently that even a 40-lb resupply load feels manageable on steep climbs.
For the AT, where towns are frequent, 3-4 day intervals work beautifully. You'll carry less weight, enjoy fresher food, and have more opportunities to adjust your menu based on cravings. The PCT and CDT demand longer stretches through remote wilderness, so plan for 5-7 day carries in sections like the Sierra or southern Colorado.
💡 Pro Tip: Mark your resupply stops on a spreadsheet with mileage, estimated arrival dates, and a backup plan if you need to skip a stop due to injury or weather.
Mail Drops: When and How to Use Them
Mail drops shine in three scenarios: remote trail sections with no stores, towns with terrible resupply options (looking at you, Kennedy Meadows), and when you have specific dietary needs that small-town gas stations can't meet (vegan, gluten-free, keto).
Mail Drop Advantages
| Criteria | Score |
|----------|-------|
| Cost Control | 8/10 |
| Nutritional Customization | 10/10 |
| Convenience | 6/10 |
| Flexibility | 4/10 |
Shipping boxes from home lets you buy in bulk, portion exactly what you need, and include comfort items (favorite candy, electrolyte mixes, spices) that trail towns rarely stock. You'll pay less per calorie buying oatmeal and trail mix from Costco than from a rural gas station charging tourist prices.
The downside? You're locked into a menu you planned months ago, before you knew you'd be craving fresh fruit and real sandwiches by week three. And if you fall behind schedule or get injured, your perfectly timed boxes sit collecting dust.
✅ Pros:
- Total control over nutrition and portion sizes
- Bulk buying saves money per calorie
- No risk of stores being closed or out of stock
❌ Cons:
- Shipping costs add $150-300 to your total budget
- Zero flexibility if your tastes or schedule change
- Requires pre-hike prep time and storage space
How to Pack Effective Mail Drops
Use USPS Priority Mail Flat Rate boxes—they're durable, track easily, and cost the same regardless of weight (critical when you're shipping 10 lbs of peanut butter). Address to "[Your Name], General Delivery, [Town], [State] [ZIP], HOLD for Thru-Hiker, ETA [date range]." Include your phone number inside in case the postmaster needs to contact you.
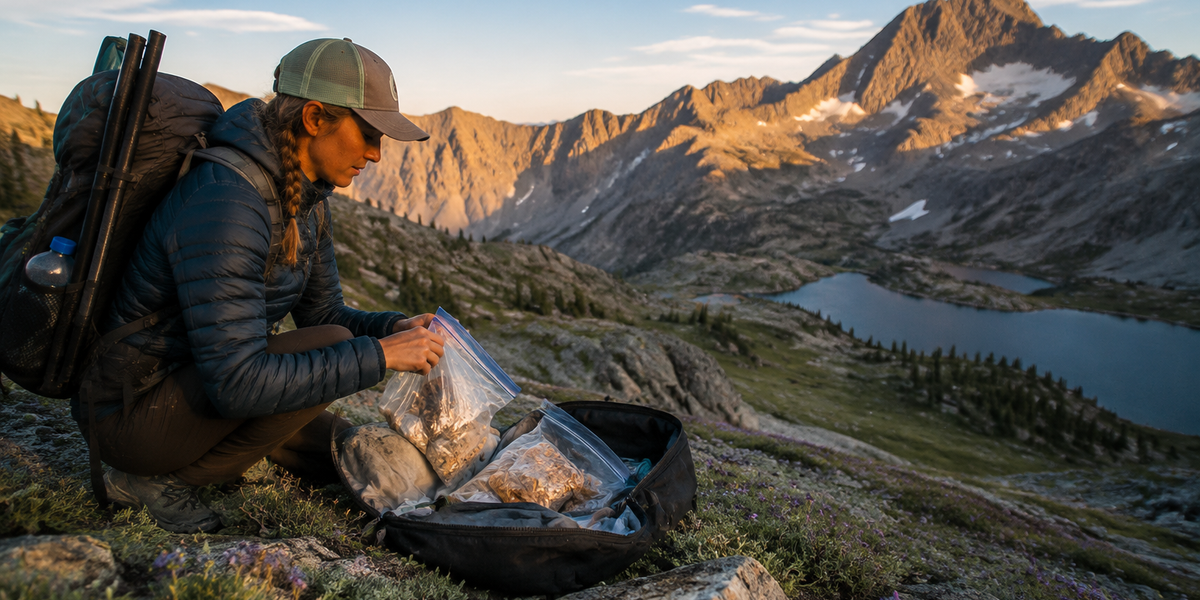
Pack 4-5 days of food per box: breakfast items (oatmeal packets, granola, instant coffee), lunch snacks (bars, jerky, crackers, cheese), dinners (dehydrated meals, pasta sides, instant rice), and high-calorie treats (chocolate, candy, nut butter packets). Add non-food essentials like toilet paper, hand sanitizer, and any medications.
💡 Pro Tip: Label the outside of each box with the resupply stop name in huge letters. When you're tired and hungry, you don't want to dig through a pile of packages to find yours.
Town Resupply: Maximum Flexibility
Town resupply is our preferred method for 70% of trail stops. You walk into town, hit the grocery store or gas station, buy exactly what sounds good that day, and keep hiking. No shipping costs, no stale food you're sick of, no stress about timing.
The challenge is that town options vary wildly. Damascus, Virginia has a full outfitter and grocery store. Stehekin, Washington has a small store with limited hours and inflated prices. Research each town's amenities on trail apps (Guthook, FarOut) and hiker forums before you commit to a resupply stop.
Town Resupply Strategy
Carry a lightweight daypack for grocery runs—the Deuter Speed Lite 30 Hiking Backpack at just 1.5 lbs is perfect for this. It stuffs into your main pack on-trail, then expands to carry your resupply haul plus laundry and town errands without destroying your back.
Shop with a checklist: breakfast (3-4 days), lunch snacks (3-4 days), dinners (3-4 nights), drinks (coffee, tea, electrolyte powder), treats (candy, chips, cookies for morale), and essentials (TP, soap, blister care). Calculate 1.5-2 lbs per day depending on your appetite and the upcoming terrain.
Don't skip the hiker box—every hostel and outfitter has one, filled with food and gear hikers no longer want. We've scored everything from unopened Mountain House meals to full fuel canisters. It's free, it's usually good quality, and it reduces waste.
💡 Pro Tip: Grocery shop in the morning before hitting the trail. Afternoon resupply runs eat into hiking time and leave you rushing to find lodging or make miles before dark.
The Hybrid Approach: Best of Both Worlds
After years of experimentation, we recommend a hybrid strategy: mail drops for 3-5 remote sections where town options are poor, and town resupply everywhere else. This gives you the control of mail drops where you need it, plus the flexibility to adapt on the fly.
For the AT, consider mail drops to: Fontana Dam (limited hours), Nantahala Outdoor Center (expensive), and anywhere in the 100-Mile Wilderness. Resupply in town everywhere else—Damascus, Hot Springs, Waynesboro, Harpers Ferry, and Hanover all have excellent options within walking distance.
For the PCT, mail to: Kennedy Meadows (poor selection), Vermillion Valley Resort (expensive, limited), and Stehekin (limited hours). Town resupply works well in Bishop, Lone Pine, South Lake Tahoe, Cascade Locks, and every Washington town.
For the CDT, mail to remote sections of New Mexico and the San Juans in Colorado. Resupply in town in Silver City, Grants, Pagosa Springs, and every Montana town.
Bounce Boxes: Your Rolling Closet
A bounce box is a single package you mail ahead to yourself at each stop, carrying items you need periodically but not daily. Common contents: extra socks and base layers for cold snaps, first aid refills, extra maps and guidebook pages, charging cables, nail clippers, and comfort items like a paperback book.
The rule: keep it under 5 lbs. A bounce box should make your life easier, not become a burden you're constantly mailing and picking up. If you find yourself not opening it at multiple stops, cull the contents.
Address it the same way as mail drops, and update the "forward to" address on the outside at each pickup so the postmaster knows where to send it next if you miss the window.
💡 Pro Tip: Use a bounce box to rotate your MSR PocketRocket 2 Ultralight Backpacking Stove and fuel canisters. In remote sections where you need to cook, bounce the stove ahead. In sections where cold-soaking works, bounce it forward to skip the weight.
Calculating Food Quantities
The average thru-hiker burns 3,000-5,000 calories per day depending on pace, terrain, body size, and weather. Most aim for 1.5-2 lbs of food per day, focusing on calorie-dense options:
- Fats: 9 calories per gram (nut butters, olive oil, cheese, chocolate, nuts)
- Carbs: 4 calories per gram (pasta, rice, oats, tortillas, candy)
- Protein: 4 calories per gram (jerky, tuna packets, protein powder, beans)
Plan for 120-150 calories per ounce of food weight. If you're carrying 10 lbs (160 oz) of food for 5 days, that's 19,200-24,000 total calories, or 3,840-4,800 per day—right in the target range.
Don't over-pack. Carrying 3 days of food for a 2-day section wastes energy and slows you down. Under-packing is equally bad—nothing kills morale like rationing Clif Bars on day four because you miscalculated.
Timing Your Stops
Post offices in small trail towns keep limited hours—often 9am-1pm on weekdays, closed Saturdays, and always closed Sundays. If you arrive Saturday afternoon, you're waiting until Monday morning to pick up your box. Outfitters and hostels that accept mail drops usually have longer hours and weekend availability, but charge a $5-10 holding fee.
Plan to arrive in town mid-morning on a weekday whenever possible. This gives you time to resupply, do laundry, grab a hot meal, and either hike out the same afternoon or get a cheap hostel bed for the night.
If you're running behind schedule (weather delays, injuries, slow pace), call ahead to extend your hold. Most postmasters are hiker-friendly and will hold packages beyond the standard 30 days if you communicate.
Frequently Asked Questions
How much does resupply cost on a thru-hike?
Expect $10-15 per day for food, whether you're mailing boxes or buying in town. If you mail 15 boxes, add $150-300 in shipping. Total food costs for a 5-month thru-hike run $1,500-2,250. Buying in bulk at home and mailing boxes saves money per calorie, but shipping costs offset some savings. Town resupply costs more per item (gas station markup), but eliminates shipping.
Should I send myself fresh food in mail drops?
No. Ship only shelf-stable items (dried, freeze-dried, canned, or heavily preserved). Fresh produce, bread, cheese, and deli items go bad in hot post offices. Save fresh food for town resupply stops where you can buy it the same day and eat it immediately.
What if I fall behind schedule and miss my mail drop window?
Call the post office or holding location as soon as you realize you'll be late. Most will extend the hold if you ask. If they've already returned your package to sender, you'll need to resupply in town and have someone mail you a replacement box to your next stop. This is why hybrid strategies work better than 100% mail drops—you always have a backup.
Can I resupply at hostels and outfitters instead of post offices?
Yes, and it's often better. Hostels and outfitters have longer hours, hold packages indefinitely (for a small fee), and usually stock basic resupply items (fuel, snacks, ramen). They're also more hiker-friendly—postmasters in tiny towns sometimes get grumpy about the thru-hiker surge.
How do I handle fuel canisters?
You cannot mail fuel canisters—they're prohibited in USPS, UPS, and FedEx shipments. Buy fuel in town at outfitters, or use a bounce box strategy: purchase a canister in town, use it for a section, bounce the stove and partially-used canister ahead to your next cooking section. Most trail towns have isobutane canisters, but availability varies in remote areas, so always check ahead.
Final Thoughts
Your resupply strategy is as personal as your hiking style. Some thru-hikers love the ritual of opening mail drops and seeing familiar foods. Others thrive on the spontaneity of walking into a trail town and deciding what sounds good in the moment. We've found the hybrid approach—mail drops for remote sections, town resupply everywhere else—offers the best balance of cost, convenience, and flexibility.
Start by mapping your entire trail, marking every resupply opportunity with mileage and amenities. Identify 3-5 sections where mail drops make sense (limited options, dietary restrictions, or personal preference), and plan to resupply in town for the rest. Test your packing strategy on a shakedown hike to dial in your daily food weight and calorie needs.
Most importantly, stay flexible. If your plan isn't working—you're carrying too much, running out too soon, or sick of your mail drop menu—adjust. Thru-hiking is about the journey, and your resupply strategy should make the experience better, not add stress. Now get out there, stay fueled, and crush those miles.
Editor's Choice
Osprey Atmos AG 65 Backpacking Pack — The Anti-Gravity suspension makes long resupply carries between remote trail sections comfortable even when you're hauling 7 days of food, and the 65L capacity handles everything without forcing you to strap gear outside.
Deuter Speed Lite 30 Hiking Backpack — Pack this ultralight daypack inside your main bag and deploy it for town resupply runs, keeping your big pack at the hostel while you grocery shop, do laundry, and run errands without the awkward weight.
MSR PocketRocket 2 Ultralight Backpacking Stove — Fuel canisters are available in nearly every trail town across the AT, PCT, and CDT, making this stove the most reliable choice for thru-hikers who want hot meals without the complexity of alcohol or white gas stoves.