Disclosure: As an Amazon Associate, HikePod earns from qualifying purchases at no extra cost to you.
⭐ Our Top Pick
🏆 Best Overall: Rumblestone Fire Pit Kit — pre-cut blocks, steel ring included, and assembled in under two hours with zero masonry experience.
💰 Best Value: Recycled Pallet Benches — free or near-free lumber from local sources, customizable to your exact seating layout, and built in a single afternoon.
Introduction
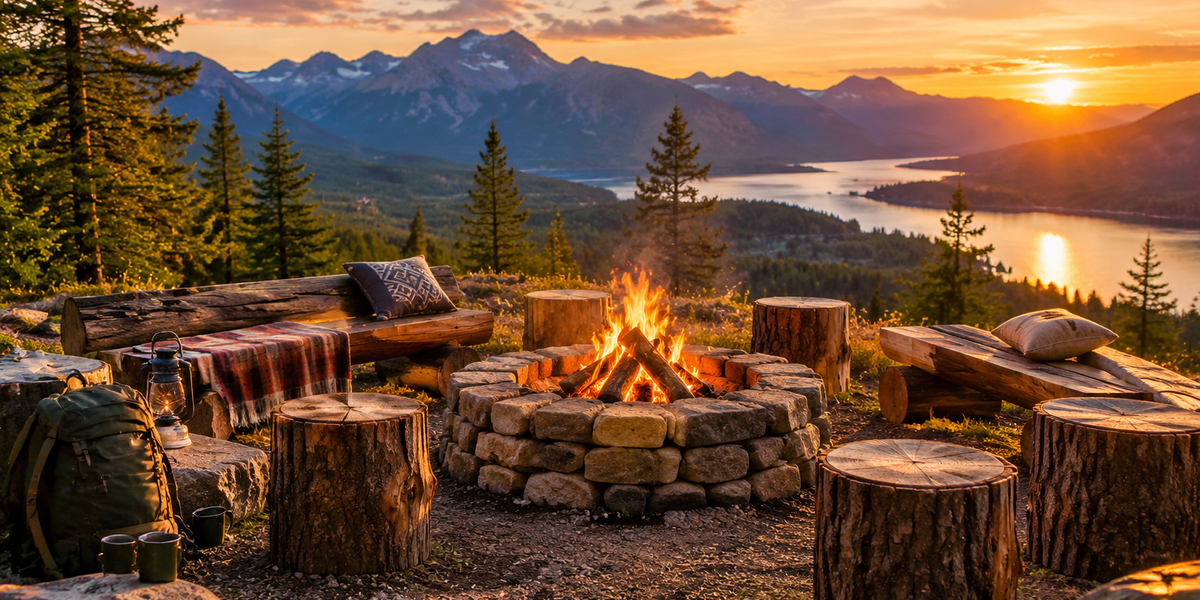
A backyard fire pit transforms ordinary evenings into s'mores summits, stargazing sessions, and impromptu gatherings—but the quotes from contractors and big-box "outdoor living" showrooms can hit four figures before you've even picked a stone. The good news: with reclaimed materials, a weekend of elbow grease, and a smart plan, you can build a functional, attractive fire pit seating area for under $500—and in many cases, under $300.
We researched dozens of DIY fire pit builds, compared material costs from home centers and salvage yards, and compiled the most cost-effective techniques that don't sacrifice safety or style. Whether you're working with a compact patio corner or a sprawling lawn, this guide walks you through site prep, fire pit construction, seating options, and finishing touches that deliver backyard ambiance without the backyard-renovation budget. If you're outfitting the rest of your outdoor space, see our Best Outdoor Ceiling Fans for Covered Patios 2026: Wet-Rated Picks Tested guide for overhead comfort on hot summer nights.
By the end, you'll have a clear material list, step-by-step build instructions, and pro tips to sidestep the rookie mistakes that cost time and money.
What to Look For
Site Selection & Clearances — Place your fire pit at least 10–15 feet from structures, fences, and overhanging branches. Check local fire codes and HOA rules before breaking ground; many municipalities require permits for permanent in-ground pits or restrict open flames during dry seasons. Choose level ground or plan to excavate and compact a stable base.
Fire Pit Materials — Concrete retaining-wall blocks, natural field stone, or steel rings all work on a budget. Avoid river rock or water-smoothed stones inside the fire ring—they can explode when heated. Firebrick liners (optional but recommended) extend the life of your pit and reflect heat outward.
Seating Layout & Capacity — Plan 18–24 inches of bench width per person and position seating 3–4 feet from the fire ring for comfortable heat without smoke in your face. U-shaped or circular bench layouts encourage conversation; straight benches work for smaller spaces. Reclaimed lumber, concrete blocks with cushions, or landscape timbers all deliver budget seating.
Base & Drainage — A 4-inch layer of pea gravel or decomposed granite under and around the pit prevents puddling, suppresses weeds, and gives you a stable, level surface. Edge the area with landscape pavers, steel edging, or stacked stone to keep gravel in place and define the space visually.
Lighting & Ambiance — Solar stake lights, string lights on shepherd's hooks, or battery-powered lanterns add after-dark visibility and atmosphere for under $50. Skip hardwired electrical unless you're already trenching—battery tech in 2026 delivers weeks of runtime per charge.
Fire-Starting Gear — Reliable ignition saves frustration and wasted kindling. A quality ferro rod like the bayite 4-Inch Ferro Rod Fire Starter with Paracord Handle throws 5,500°F sparks in any weather, works wet or dry, and lasts for 12,000+ strikes—making it the go-to budget fire starter in the bushcraft community and a smart addition to your fire-pit toolkit.
Step-by-Step Build Guide
1. Mark and Excavate the Site
Stake out a circle or square 6–8 feet across (fire ring plus seating zone). Remove sod and topsoil to a depth of 4–6 inches. Use a hand tamper or rented plate compactor to firm the base—this prevents settling and keeps your fire pit level over time.
💡 Pro Tip: Rent a sod cutter for $60/day if you're excavating more than 100 square feet. It's faster than a shovel and leaves clean edges you can replant elsewhere.
2. Lay the Gravel Base
Spread 4 inches of pea gravel or ¾-inch crushed stone, rake level, and compact. This layer drains rainwater, stabilizes the fire ring, and creates a defined surface that won't turn to mud. Budget $30–$80 depending on whether you buy bagged gravel at a home center or order bulk delivery (bulk is always cheaper for areas over 50 square feet).
3. Build the Fire Ring
| Criteria | Score |
|----------|-------|
| Ease of Assembly | 9/10 |
| Heat Retention | 8/10 |
| Aesthetic Appeal | 7/10 |
| Value for Money | 9/10 |
A Rumblestone Fire Pit Kit is the fastest route: pre-cut trapezoidal blocks stack into a 38- or 46-inch ring without mortar, and most kits include a steel ring insert. Dry-stack the first course on the compacted gravel, check level with a 4-foot spirit level, then stack two or three additional courses. No cutting, no mortar, no masonry skills required—most first-timers finish in under two hours.
Alternatively, salvage natural field stone from your property or a local quarry ($0–$50) and stack it freehand for a more organic look. Line the interior with firebrick ($1–$2 per brick, 20–30 bricks for a 36-inch pit) to protect the stone and reflect heat.
✅ Pros:
- Pre-cut blocks guarantee a symmetrical ring every time
- Steel insert included in most kits keeps logs contained
- Available at Home Depot, Lowe's, and regional landscape suppliers
❌ Cons:
- Weighs 300+ pounds—delivery or a pickup truck required
- Limited color palette (gray, tan, charcoal)
4. Construct DIY Benches
| Criteria | Score |
|----------|-------|
| Material Cost | 10/10 |
| Build Difficulty | 6/10 |
| Comfort | 7/10 |
| Weather Resistance | 6/10 |
Reclaimed pallet wood is the reigning budget champion: scour Craigslist, Facebook Marketplace, or behind retail centers for heat-treated (HT-stamped) pallets—never chemically treated (MB-stamped). Disassemble with a pry bar, cut 2×4 slats to length, and assemble simple bench frames with 3-inch deck screws. A basic 6-foot bench uses two pallets, costs $0–$20 in materials, and takes 2–3 hours to build.
Seal all wood with exterior stain or polyurethane (budget $30 for a gallon that covers 4–5 benches). For extra comfort, top benches with outdoor cushions from discount home stores—$15–$25 each—and store them inside when not in use.
Alternative budget seating: concrete retaining-wall blocks stood on end ($2–$4 per block) topped with 2×10 cedar boards, or landscape timbers (6×6 treated lumber, $15–$25 each) laid directly on gravel and anchored with rebar stakes.
✅ Pros:
- Nearly free material if you source pallets locally
- Fully customizable—length, height, backrest angle
- Rustic aesthetic suits fire-pit gatherings
❌ Cons:
- Requires circular saw, drill, and basic carpentry confidence
- Wood must be sealed annually to prevent rot and splinters
5. Add Edging and Pathways
Define the seating area with a border of landscape pavers ($0.50–$1.50 each), reclaimed brick, or steel landscape edging ($30 for a 20-foot roll). This keeps gravel from migrating into the lawn and gives the space a finished, intentional look. If your fire pit is more than 20 feet from the house, lay a simple gravel or stepping-stone path so guests aren't tromping through wet grass in the dark.
💡 Pro Tip: Bury edging 2–3 inches deep and backfill with soil on the lawn side for a seamless transition that hides the metal lip.
Finishing Touches on a Budget
String Lights — Hang Edison-bulb string lights on shepherd's hooks ($40 for a 48-foot strand) or wrap them around nearby trees. Solar-charged strands eliminate extension cords and timers.
Firewood Storage — Build a simple log rack from concrete blocks and 4×4 posts, or stack firewood between two T-posts. Keep a season's supply covered with a tarp to ensure dry burns and easy ignition.
Portable Fire-Starting Kit — Alongside your ferro rod, keep an Atomic Bear Paracord Bracelet (2-Pack) in your outdoor gear bin. Each bracelet packs a built-in ferro rod, compass, whistle, and 12 feet of military-grade paracord—so you've got wearable backup fire-starting capability even if your main kit walks off mid-party.
Beverage & S'mores Station — Repurpose a small side table or build a simple shelf from leftover lumber to hold drinks, skewers, and marshmallow supplies within arm's reach of the benches.
Frequently Asked Questions
Can I build a fire pit directly on grass or soil?
You can, but it's not ideal. Grass will die from heat and foot traffic, and bare soil turns muddy after rain. A 4-inch gravel base adds only $30–$50 to the project, drains water, and keeps the area clean and level year-round.
Do I need a permit for a backyard fire pit?
It depends on your municipality. Many cities allow portable, above-ground fire pits without permits but require permits for permanent in-ground or masonry structures. Check your local fire marshal's office and HOA covenants before you dig. Some areas ban open fires entirely during fire season.
How far should seating be from the fire ring?
Three to four feet strikes the best balance—close enough to feel the heat and roast marshmallows, far enough to avoid sparks and smoke in your face. If you're hosting larger groups, add a second row of portable chairs 6–7 feet back.
What's the most budget-friendly seating option?
Reclaimed pallet benches top the list at $0–$40 per bench if you source pallets locally and already own basic tools. Concrete blocks with cushions run a close second at $2–$4 per block plus $15–$25 per cushion, with zero carpentry required.
How do I keep my fire pit area weed-free?
Lay landscape fabric under the gravel base before spreading stone. The fabric blocks weed growth while allowing water to drain. For existing weeds, pull them by hand or spray with vinegar-based herbicide—avoid harsh chemicals near seating areas.
Final Thoughts
Building a DIY fire pit seating area on a budget isn't just about saving money—it's about creating a backyard gathering space that feels personal, functional, and earned. With reclaimed lumber, a kit fire ring, and a weekend of work, you'll have a cozy spot for s'mores, stories, and stargazing that cost a fraction of a contractor's quote and delivers years of memories.
Start with a solid gravel base, choose a fire ring method that matches your skill level and timeline, and lean into budget seating solutions like pallet benches or block-and-board combos. Add string lights, stack your firewood, and keep reliable fire-starting tools on hand so every gathering kicks off smoothly. For more ways to level up your outdoor space, check out our Best Outdoor Pizza Ovens 2026: Wood-Fired vs Gas Compared guide to pair your new fire pit with wood-fired cooking.
Grab your tools, source your materials, and get building—you're one weekend away from backyard nights that feel like vacation.
Editor's Choice
bayite 4-Inch Ferro Rod Fire Starter with Paracord Handle — Throws 5,500°F sparks in any weather, lasts for 12,000+ strikes, and costs under $15—essential insurance against damp kindling and windy nights.
Atomic Bear Paracord Bracelet (2-Pack) — Wearable backup fire kit with built-in ferro rod, compass, whistle, and 12 feet of paracord—perfect for the host who wants redundancy without cluttering the fire-pit toolbox.